Desserts
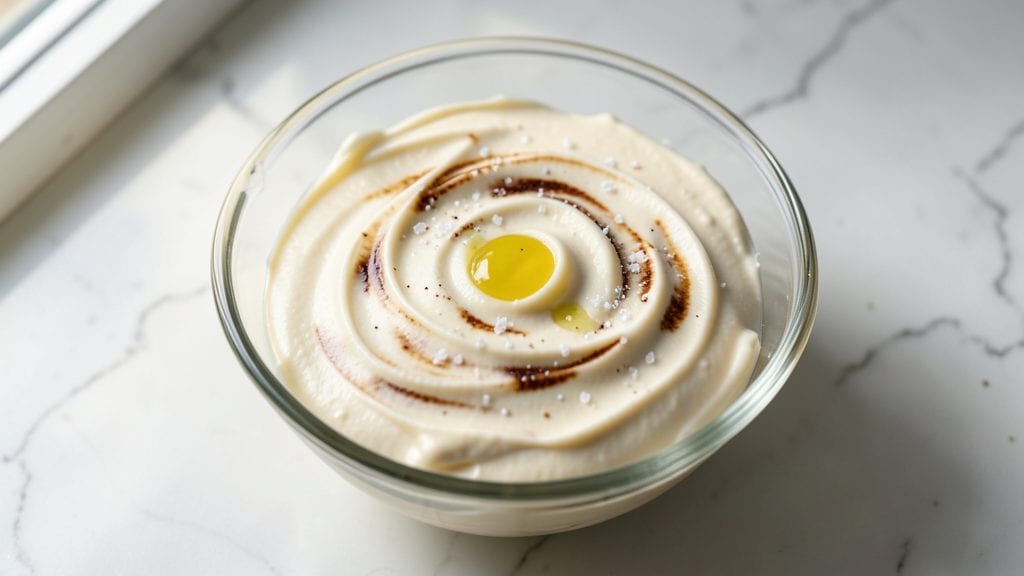
This Betty Crocker-inspired cream cheese icing delivers the perfect balance of tangy richness and velvety smoothness for decorating cakes and cupcakes. The secret lies in precise ratios of powdered sugar, butter, and cream cheese that create a stable yet spreadable consistency—no graininess or separation here.
I’ve tested countless variations to perfect this recipe, ensuring it stays smooth at room temperature and holds its shape when piped.
The foundation of great cream cheese icing is patience and proper technique. Whipping the butter and cream cheese together until completely smooth is critical—this step eliminates lumps and ensures a silky texture.
The powdered sugar adds sweetness while keeping the icing light enough to spread or pipe without sinking into cakes. For extra stability, I recommend chilling the icing for 30 minutes before decorating, which helps it hold its shape beautifully.
What sets this icing apart is its versatility—use it as a frosting for layer cakes, a filling for cream-filled donuts, or even a glaze for pastries. The tangy cream cheese flavor pairs perfectly with vanilla, chocolate, or fruit-based desserts, adding a sophisticated touch without overpowering.
Once you try this recipe, you’ll never settle for store-bought again—it’s that good.
Store leftovers in an airtight container in the refrigerator for up to 5 days, or freeze for longer storage. Before using, let it sit at room temperature for 10-15 minutes to soften for easy spreading. This icing is your new go-to for professional-quality cake decorating at home.
Ingredients for betty crocker cream cheese icing
Four core ingredients plus a few finishing touches for restaurant-quality icing every time.
| Ingredient | Amount | Notes |
|---|---|---|
| Cream Cheese 🧀 | 8 oz | Full-fat, room temperature preferred |
| Unsalted Butter 🧈 | ½ cup | Cold, cut into small cubes |
| Powdered Sugar 🍚 | 3 cups | Sifted, fine grain preferred |
| Vanilla Extract 🌿 | 1 tsp | Pure, high-quality vanilla |
| Lemon Juice 🍋 | 1 tbsp | Freshly squeezed, bright flavor |
| Diamond Crystal Kosher Salt 🧂 | ¼ tsp | Fine grain, enhances flavor |
| Heavy Whipping Cream 🥛 | ¼ cup | Cold, for stability and spread |
| Food Coloring (optional) 🎨 | 1 tsp | Gel-based for vibrant swirls |
The cream cheese is non-negotiable—Philadelphia brand works best for its consistent texture, but any full-fat, block-style cream cheese will do. Room temperature is key: lumps disappear when it's soft but not melted. Butter matters just as much; European-style unsalted adds richness without overpowering. I grab mine from Whole Foods or Trader Joe's—avoid the salted kind unless you adjust the salt later. Powdered sugar should be sifted to prevent graininess; Domino brand is my go-to because it dissolves smoothly. Pro tip: measure the sugar first, then sift directly into your mixing bowl to avoid waste.
No vanilla extract? Vanilla bean paste works beautifully—just use half the amount. Short on butter? Coconut oil at room temperature mimics the fat content, though the flavor won't be identical. The heavy cream is optional but adds a luxurious sheen and helps the icing hold its shape when piped. For colored swirls, gel food coloring is your best bet—it won't alter the texture like liquid dyes. If you're making this ahead, store the dry ingredients (powdered sugar, salt) separately from the wet ones (cream cheese, butter) in the fridge for up to 3 days—just mix when ready.
This icing stays fresh for 5 days in the fridge when stored in an airtight container, but the texture improves after 24 hours as the flavors meld. For longer storage, freeze portions in small containers—thaw at room temperature for 15-20 minutes before using. Chill the icing for 30 minutes before decorating to prevent melting. It pipes beautifully through a star tip for swirls or a round tip for borders. Leftovers? Toss them in the freezer for up to 3 months—perfect for last-minute cake emergencies.
Why You'll Love This Recipe
- Four-Ingredient Magic: I keep a tub of cream cheese and a stick of butter in my fridge just for this—mix, beat, and boom, you’ve got velvety perfection. No measuring cups, no sifting, no fuss. The powdered sugar dissolves like a dream when you add it warm, and that first taste of vanilla-kissed cream cheese? It’s the kind of simple that feels luxurious.
- Zesty Twist: Honestly, the lemon juice is what makes this icing mine—bright enough to cut through the sweetness but never overpowering. That tang turns it from basic frosting to something that actually makes people pause and say, “Wait, what’s in this?” (Spoiler: It’s just a little citrus magic.)
- Cake or Cookie?: This icing doesn’t care what you slather it on. Too thick for cupcakes? Thin it with milk. Too runny for a sheet cake? Add more powdered sugar. I’ve used it on pound cake, cinnamon rolls, and even as a glaze for cheesecake—every time, it’s the star. No judgment, no rules.
- No-Waste Wonder: Between us, this recipe makes way more than I need for one project. The leftovers? I stash them in the fridge for up to a week—perfect for last-minute decorating or when I forget to bake but still need something sweet. And because it’s just four ingredients, it’s cheap enough that I don’t stress about “wasting” it. Win-win.
Step-by-step instructions for Betty Crocker cream cheese icing
Here's how to create that signature velvety, swirl-worthy icing that's perfect for cake decorating.
Beat Cream Cheese and Butter Until Smooth
In a large mixing bowl, combine the 8 oz cream cheese and 0.5 cup unsalted butter cut into small cubes. Using a hand mixer or stand mixer fitted with the paddle attachment, beat on medium speed for 2-3 minutes until completely smooth and creamy. You'll know it's ready when the mixture looks like thick, pale yellow pudding with no lumps remaining.
This step is critical—don't rush it. If you see any graininess, keep mixing for another 30 seconds. The butter should be fully incorporated, and the cream cheese should be completely broken down. If the mixture starts to curdle, reduce the speed to low and continue beating until smooth again. Here's the thing—room temperature cream cheese works best, but if yours is slightly cold, the extra mixing time will help it blend properly.
Gradually Add Powdered Sugar and Whipping Cream
With the mixer running on low speed, gradually add the 3 cups powdered sugar and 0.25 cup heavy whipping cream in three additions. After each addition, mix until just combined before adding more. This gradual approach prevents a sugar avalanche that can cause lumps. You want the icing to be thick but still pourable—like a smooth, glossy frosting that holds its shape when spread.
If the icing becomes too stiff, add 1 tablespoon of milk or water at a time until it reaches your desired consistency. The mixture should coat the back of a spoon but still flow smoothly. Here's where precision matters: too much liquid makes it runny; too little makes it crumbly. Aim for that perfect balance where it's thick enough to pipe but still swirls beautifully.
Incorporate Flavoring and Color
Add the 1 tsp vanilla extract, 1 tbsp lemon juice, and 0.25 tsp diamond crystal kosher salt to the icing mixture. Mix on low speed for 30 seconds until fully combined. The lemon juice brightens the flavor, while the salt enhances all the sweet notes. Taste a small spoonful—you should detect a subtle tang from the lemon and a warm vanilla aroma.
If using, divide the icing into two separate bowls. Add 1 tsp food coloring to one bowl and mix well. For vibrant swirls, use gel-based coloring—it mixes more evenly without thinning the icing. If the icing looks too thick after adding color, mix in 1 teaspoon of milk at a time until smooth. The colored portion should be the same consistency as the plain icing to ensure perfect swirls.
Achieve Perfect Swirls for Decorating
Transfer the plain icing to a piping bag fitted with a star tip. Pipe a thick border around the edge of your cake, leaving about 1 inch of space in the center. Then, pipe a second border inside the first, creating a ½-inch wide frame. This double border technique creates a clean canvas for your swirls.
Spoon the colored icing into a piping bag with a large round tip. Pipe dollops of colored icing onto the plain icing border, spacing them about 1 inch apart. Using a butter knife or offset spatula, gently drag the knife through the dollops from the center outward, creating smooth, even swirls. Work quickly—you have about 30 seconds before the icing starts to set. For extra flair, repeat the process with a second color, piping dollops on top of the first set of swirls before dragging the knife through again.
Set and Serve for Maximum Impact
Allow the icing to set at room temperature for 15-20 minutes before serving. This brief resting period lets the colors meld slightly and the texture firm up just enough to hold its shape. If you're decorating a cake that needs to be refrigerated, chill for 10 minutes before serving to prevent melting.
The finished icing should have a glossy, velvety appearance with clean, defined swirls that contrast beautifully against the cake. Each bite should deliver that signature cream cheese tang balanced by the bright lemon and rich vanilla. For extra shine, lightly brush the set icing with a tiny bit of milk using a pastry brush. This technique enhances the professional look and makes the colors pop even more.
Pro Tips For Making Betty Crocker Cream Cheese Icing
- SOFTEN CREAM CHEESE FIRST: DESCRIPTION:
- WEIGH THE POWDERED SUGAR: DESCRIPTION:
- BEAT BUTTER IN GRADUALLY: DESCRIPTION:
- ADD LEMON JUICE LAST: DESCRIPTION:
Dietary considerations for these flavors
Gluten-Free Adaptations
This icing is naturally gluten-free since it relies on powdered sugar, butter, and cream cheese—no flour or wheat-based ingredients. The key is ensuring all your ingredients are certified gluten-free. I always double-check my cream cheese (like Philadelphia Gluten-Free brand) and vanilla extract (some contain wheat).
For extra stability, replace 1 tbsp of the powdered sugar with 1 tbsp cornstarch—it helps thicken the icing without altering flavor. 🌾
Dairy-Free Swaps
For a dairy-free version, replace the cream cheese with 8 oz dairy-free cream cheese (I love Kite Hill or Miyoko's brands). Substitute the butter with vegan butter or coconut oil (use ½ cup for best texture).
The heavy whipping cream can be swapped for full-fat coconut cream, chilled overnight. Taste as you go—dairy-free versions may need 1 extra tbsp powdered sugar for stability.
Lower-Sugar Options
Reduce the 3 cups powdered sugar to 2 cups and add ½ cup monk fruit sweetener (like Lakanto) for a lower-sugar version. The texture will be slightly softer, so chill the icing for 30 minutes before decorating.
For a keto-friendly twist, use 1 cup erythritol mixed with 1 cup powdered sugar—this keeps the sweetness while cutting carbs. Adjust lemon juice to ½ tbsp to balance the tang.
Nut-Free Safety
This recipe is already nut-free, but always verify your vanilla extract and food coloring labels for cross-contamination warnings. For extra caution, use pure vanilla bean paste (like Madagascar Bourbon) and gel-based food coloring from trusted brands like Wilmington.
Store all ingredients in sealed containers to prevent accidental mixing with nut products.
Allergen-Friendly Tips
If someone has a cream cheese allergy, try a cashew cream cheese alternative (soak 1 cup cashews overnight, blend with ¼ cup water, and strain). For egg-free needs, this recipe is already safe—no eggs are used.
Always label your icing clearly if sharing with guests, especially for dairy-free or gluten-free versions. I keep a small whiteboard in my kitchen to track ingredient swaps!
Storage for Dietary Needs
Dietary adaptations often require different storage. The dairy-free version keeps for 4 days in the fridge (coconut oil can separate, so stir before use). The lower-sugar icing lasts 3 days due to reduced moisture content.
Freeze portions in 1-tbsp scoops for easy decorating—thaw at room temperature for 10 minutes. Label containers with the adaptation type to avoid mix-ups. 🧊
Nutrition facts
Frequently asked questions
Why does my cream cheese icing turn grainy?
The most common cause is not beating the cream cheese and butter long enough to fully emulsify. Mix until completely smooth with no lumps—about 2-3 minutes on medium speed. Also, ensure your cream cheese is at room temperature (not cold from the fridge). If it still looks grainy, sift the powdered sugar before adding to prevent texture issues.
Can I make this icing ahead of time?
Yes! Store the finished icing in an airtight container in the refrigerator for up to 5 days. For best results, let it sit at room temperature for 15-20 minutes before using—this softens it for easy spreading. If making ahead for a party, pipe the borders the day before and add swirls fresh for vibrant colors.
How do I fix icing that's too thick or too thin?
For thick icing, add 1 tablespoon milk or water at a time while mixing. For thin icing, gradually add 1 tablespoon powdered sugar until it reaches a spreadable consistency. The ideal texture should coat the back of a spoon but still hold its shape when piped. A quick test: if it drips off a spoon, it's too thin.
What's the best way to decorate with this icing?
Pipe a double border first—use a star tip for the outer edge and a round tip for the inner frame. Then pipe dollops of colored icing and drag a knife through for swirls. Work quickly before the icing sets! For cakes with multiple layers, chill between layers to prevent sinking. Pro tip: Use a toothpick to smooth rough edges after piping.
Can I use this icing for cupcakes instead of cakes?
Spread a thin layer on cooled cupcakes, then pipe swirls on top. For extra flair, add sprinkles or edible glitter before the icing sets. Since cupcakes are smaller, you'll need about 2-3 tablespoons of icing per cupcake. Chill for 10 minutes before serving to prevent melting.