Main Courses
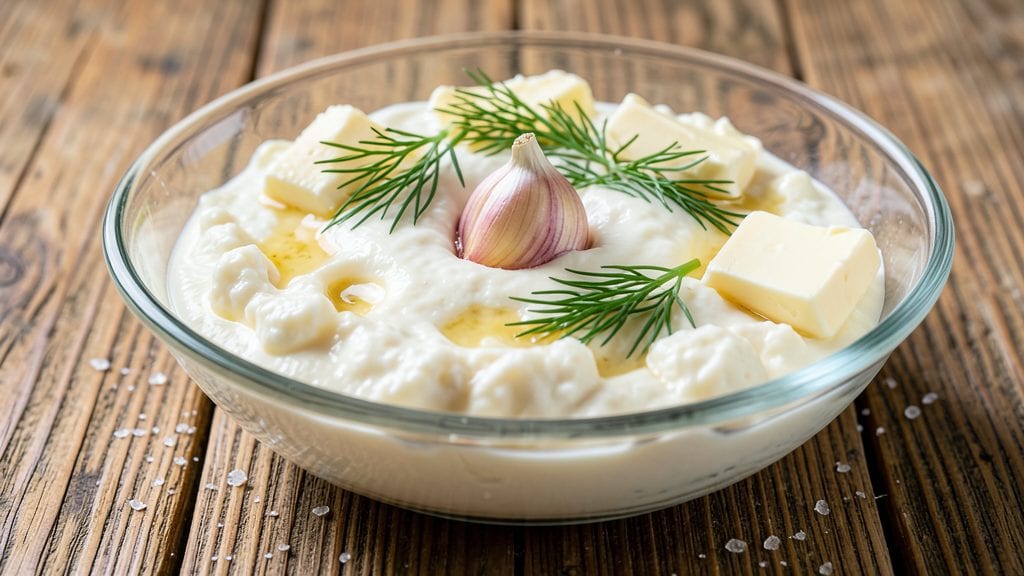
Making farmer's cheese at home transforms simple milk into a versatile, crumbly delight that rivals store-bought versions—though with far more character. I first discovered this recipe while trying to recreate my grandmother's Sunday roast chicken sides, where fresh cheese elevated every dish from ordinary to extraordinary.
The process is surprisingly straightforward once you understand the science behind curdling and draining.
This recipe starts with just milk and an acid (vinegar or lemon juice) to create curds that drain into a soft, spreadable cheese with a delicate tang. The key lies in proper temperature control and gentle handling—too much heat or agitation will ruin the texture.
What makes this cheese special is its versatility: use it as a spread, crumble it over salads, or blend it into dips. The results are fresher, creamier, and more flavorful than anything you'll find pre-packaged.
By the end, you'll have a batch of fresh farmer's cheese that's ready to transform your meals—whether it's a simple cheese board, a creamy sauce for pasta, or a topping for roasted vegetables. The best part?
You can make it in just 30 minutes with ingredients you likely already have on hand. Let's get started on creating this homemade staple that will change how you think about fresh cheese forever.
For those who want to experiment, try adding herbs, garlic, or chili flakes to create flavored variations. Proper storage in an airtight container keeps it fresh for up to a week in the refrigerator, making it perfect for meal prep.
This isn't just cheese—it's a foundation for countless dishes that will make your kitchen smell like a countryside dairy every time you open the fridge.
Ingredients for farmer's cheese
Four simple ingredients transform milk into creamy, crumbly farmer's cheese—no fancy tools needed.
| Ingredient | Amount | Notes |
|---|---|---|
| Whole Milk 🥛 | 4 cups | High-fat (3.5% or higher) preferred |
| White Vinegar 🍋 | 2 tbsp | Or lemon juice for tangier flavor |
| Unsalted Butter 🧈 | 2 tbsp | Cold, cubed for texture |
| Salt 🧂 | ½ tsp | Fine sea salt preferred |
| Fresh Dill 🌿 | ¼ cup | Chopped, optional for flavor |
| Garlic Cloves 🧄 | 2 cloves | Minced, optional for depth |
| Cheesecloth 🧻 | 1 sheet | Or clean kitchen towel |
| Colander 🥫 | 1 whole | For draining curds |
| Large Bowl 🍲 | 1 whole | For mixing milk |
| Medium Saucepan 🔥 | 1 whole | For heating milk |
| Thermometer 🌡️ | 1 whole | Kitchen thermometer for accuracy |
The milk is everything here. Whole milk with 3.5% fat or higher gives that classic rich texture—skim milk won't work. Store-brand works fine, but organic milk has a cleaner taste. I grab mine from Trader Joe's because it's consistently fresh. For the vinegar, white vinegar is reliable, but apple cider vinegar adds subtle sweetness. The butter? Cold, unsalted cubes blend in beautifully—skip the salted kind (the salt can overpower). If you're feeling fancy, add fresh dill or minced garlic to the curds before draining for extra flavor.
No vinegar? Lemon juice works 1:1, though it'll make your cheese slightly tangier. Short on butter? Olive oil at half the amount keeps it creamy, but the flavor will differ. The cheesecloth? An old pillowcase or clean kitchen towel works in a pinch. Just don't use paper towels—they tear too easily. For the thermometer, any kitchen thermometer will do—you're aiming for 185°F (85°C) to avoid scorching the milk. Pro tip: If your cheese turns out too wet, sprinkle a pinch more salt and let it drain longer.
This cheese keeps best in an airtight container in the fridge for 5-7 days. For longer storage, portion it into small containers and freeze for up to 3 months. The texture changes slightly after freezing—it gets slightly grainier—but it's perfect for cooking. I like to make a double batch: one for spreading on toast, another for blending into dips. The leftovers make amazing cheese boards too—just crumble it over fresh fruit and nuts.
Why You'll Love This Recipe
- Pantry Magic: I swear by this recipe because it turns three things—milk, vinegar, and butter—into something rich and creamy with zero fancy tools. No straining, no waiting hours, just a pot, a spoon, and 20 minutes of your time. Honestly, it’s the kind of recipe that makes me feel like a chef when I’m really just making dinner.
- Butter-Soft Richness: That first bite of fresh farmer’s cheese—tangy from the vinegar, silky from the butter, and brightened by dill—is pure satisfaction. It’s not sweet or overly salty; it’s just right, like the perfect balance of comfort and freshness. I’ll be real: I’ve made it plain, herbed, and even mixed into scrambled eggs, and every version hits the spot.
- Everyday Hero: This cheese is my go-to for quick dips, sandwich spreads, or even a simple breakfast with toast and jam. (Yes, even on a Tuesday night.) It keeps for days in the fridge, so I make a big batch and use it in everything—from stuffed peppers to a creamy soup base. No waste, just delicious flexibility.
- Budget Cheese Win: Forget buying expensive specialty cheese when you can make this for pennies using ingredients you already have. A gallon of milk and a bottle of vinegar stretch far, and the butter adds just enough luxury to feel special without breaking the bank. Between us, this is how I feed my family well without stressing over grocery bills.
Step-by-step instructions for farmer's cheese
Here's how to make creamy, crumbly homemade farmer's cheese with just a few simple tools.
Heat the Milk to Curdling Temperature
Pour the 4 cups whole milk into the medium saucepan and place it over medium heat. Insert the thermometer into the milk and heat it gently, stirring occasionally to prevent scorching. You're aiming for a temperature of 185°F—this is when the milk will begin to curdle. You'll notice small, lumpy curds forming as the milk thickens and separates from the whey.
I like to keep a close eye on the thermometer during this step because overheating can make the curds tough. Once the milk reaches 185°F, remove it from the heat immediately. The curds should look like cottage cheese at this point—soft and slightly rubbery. If they look too firm, you've gone too far. Let the mixture sit off the heat for 5 minutes to complete the curdling process.
Acidify the Milk with Vinegar
After the milk has curdled, add the 2 tablespoons white vinegar all at once and stir gently for 1 minute. The vinegar helps separate the curds from the whey more completely and adds a subtle tang that balances the richness of the cheese. You'll see the mixture thicken further as the acid works its magic.
Let the mixture sit for another 5 minutes at room temperature. This resting period allows the curds to fully form and tighten. You'll know it's ready when the curds have separated cleanly from the whey, which should now be a pale yellow liquid. If the curds still look loose, you can add another ½ tablespoon vinegar and let it sit for another 5 minutes.
Drain the Curds in Cheesecloth
Line the colander with the cheesecloth and place it over another large bowl to catch the whey. Using a slotted spoon, carefully transfer the curds to the cheesecloth-lined colander. Gather the edges of the cheesecloth and twist it gently to help drain excess whey. Let the curds drain for 10 minutes—this step is crucial for achieving the right texture.
After the initial draining, you can press the cheesecloth-wrapped curds gently with your hands to remove more whey. The goal is to get rid of as much liquid as possible without squeezing the curds too tightly, which could make them rubbery. If you're adding the optional 0.25 cup fresh dill or 2 cloves minced garlic, mix them in with the curds now for extra flavor.
Season and Shape the Cheese
Once the curds have drained sufficiently, transfer them to the large bowl and gently fold in the 2 tablespoons cold cubed unsalted butter and 0.5 teaspoon salt. The butter adds richness and helps create that signature crumbly texture, while the salt enhances all the flavors. If you're using the optional dill or garlic, this is the time to incorporate them—just mix them in lightly so they're evenly distributed.
Using clean hands, shape the cheese into a log or small rounds. The texture should be soft and slightly sticky, but not wet. If it feels too moist, let it drain for another 5-10 minutes in the cheesecloth. Once it's ready, wrap it in fresh cheesecloth and place it in the refrigerator to chill for at least 4 hours, or until it firms up and becomes crumbly.
Enjoy Your Homemade Farmer's Cheese
After chilling, your farmer's cheese will have a beautiful crumbly texture with a mild, slightly tangy flavor. It's perfect for spreading on bread, mixing into salads, or pairing with smoked meats. To serve, simply unwrap the cheese and crumble it into small pieces. The optional dill and garlic add a fresh, herby depth that pairs beautifully with the creamy base.
This cheese keeps well in the refrigerator for up to 1 week, wrapped tightly in cheesecloth. If you find it too soft, you can let it sit at room temperature for 10-15 minutes before serving to bring out its crumbly texture. The key to success is patience—don't rush the draining or chilling steps, as they're what give this cheese its signature texture.
Pro Tips For Making Farmer'S Cheese
- Heat Milk Slowly: Warm the whole milk to 185°F (85°C)—no faster than 10 minutes on medium-low. I learned this the hard way: rushing it with high heat makes the curds rubbery and watery. A thermometer takes the guesswork out, but even without one, watch for tiny bubbles around the edges before adding vinegar.
- Use Cold Vinegar: Chill the white vinegar in the fridge for 10 minutes before mixing it into the warm milk. Cold vinegar curdles the milk more evenly, giving you cleaner, firmer curds instead of a gummy mess. (Yes, even if you’re impatient like me—this actually saves cleanup time.)
- Drain Curds Gently: Line your strainer with a clean kitchen towel or cheesecloth, then let the curds settle without pressing for the first 5 minutes. Pressing too soon squeezes out moisture unevenly, leaving your cheese lumpy. After 5 minutes, give a light press—just enough to shape it, not crush it.
- Salt in Layers: Split the salt into two batches: half when mixing the butter into the drained curds, and the rest after folding in the dill. This balances flavor without overpowering the fresh herbs. (Pro move: Toast the dill leaves in a dry pan for 30 seconds first—they’ll perfume the cheese like crazy.)
Creative variations of this recipe
Herbed Variations
Infuse your farmer's cheese with fresh herbs like dill, chives, or parsley for a bright, garden-fresh twist. I like to blend 1 tablespoon chopped fresh dill directly into the drained curds before mixing in the butter.
For a Mediterranean touch, add 2 minced garlic cloves and ½ teaspoon dried oregano—this combo works beautifully with roasted vegetables or grilled meats. 🌿
Spiced Options
For a warm, aromatic variation, fold in ½ teaspoon smoked paprika or ¼ teaspoon cayenne pepper when mixing the butter and salt. A pinch of ground cumin adds earthy depth, perfect for pairing with charred corn or spicy salsas.
I once made a batch with 1 teaspoon honey and ½ teaspoon black pepper—it became an instant hit on cheese boards with sliced apples and walnuts.
Sweet Twists
Balance the tang with sweetness by adding 1 tablespoon honey or 1 teaspoon maple syrup to the drained curds. This works wonderfully in savory-sweet dishes like stuffed peppers or as a topping for pancakes.
For a citrusy variation, zest 1 lemon and fold it into the cheese—it brightens up everything from salads to sandwiches. 🍯
Smoky & Savory
Create a smoky version by incorporating 1 teaspoon liquid smoke (like Colossal Smokehouse brand) into the butter mixture. This pairs exceptionally well with grilled meats or as a filling for baked potatoes.
For a cheesy twist on deviled eggs, mix this smoky cheese with a touch of Dijon mustard—it’s a crowd-pleaser at potlucks.
Creamy Dips
Blend your farmer's cheese with ¼ cup sour cream or Greek yogurt to create a luscious dip. Add 1 teaspoon lemon juice and a pinch of salt for a quick garlic-herb dip that’s perfect with veggie sticks or pita chips.
I once made a batch with ½ cup crumbled feta for extra tang—it became my go-to for Mediterranean nights.
Global Flavors
Transform your cheese into an Indian-inspired dish by adding ½ teaspoon garam masala and 1 minced green chili. This works beautifully in wraps or as a topping for naan.
For a Mexican flair, mix in ½ teaspoon cumin and ¼ teaspoon chili powder—it’s a fantastic filling for tacos or quesadillas. The possibilities are endless when you think globally! 🌎
Nutrition facts
Frequently asked questions
Can I use skim milk instead of whole milk for this recipe?
No, whole milk with at least 3.5% fat is essential for authentic texture. Skim milk will produce a much weaker, more watery cheese that lacks the signature crumbly richness. The fat content helps create those beautiful, firm curds that hold together properly.
What if my curds turn out too firm or rubbery?
This usually happens when you heat the milk too high or over-acidify it. For next time, remove the milk from heat as soon as it reaches 185°F and let it sit off the heat for exactly 5 minutes before adding vinegar. Start with just 1.5 tablespoons vinegar and add more only if needed. Gentle stirring is key—agitation makes curds tough.
How can I make my farmer's cheese less tangy?
Use lemon juice instead of vinegar (1:1 ratio) for a milder flavor, or reduce the acid to 1 tablespoon total. For extra smoothness, blend the drained curds with 1 tablespoon sour cream before adding butter. The longer you drain the curds (15 minutes instead of 10), the less tangy the final cheese will be.
Can I make this cheese without cheesecloth?
Use a clean kitchen towel, pillowcase, or even a coffee filter in a pinch. The key is to have something porous that won't tear when wet. Line your colander with multiple layers of your substitute to catch fine curds. Just be prepared for slightly slower draining.
What are the best ways to use up leftover whey?
Don't throw it out! Whey is packed with protein and can be used in smoothies, soups, or even fermented into probiotic drinks. Freeze it in ice cube trays for easy portioning. For baking, substitute whey for water in pancakes or waffles—it adds moisture and nutrition.