
Beverages
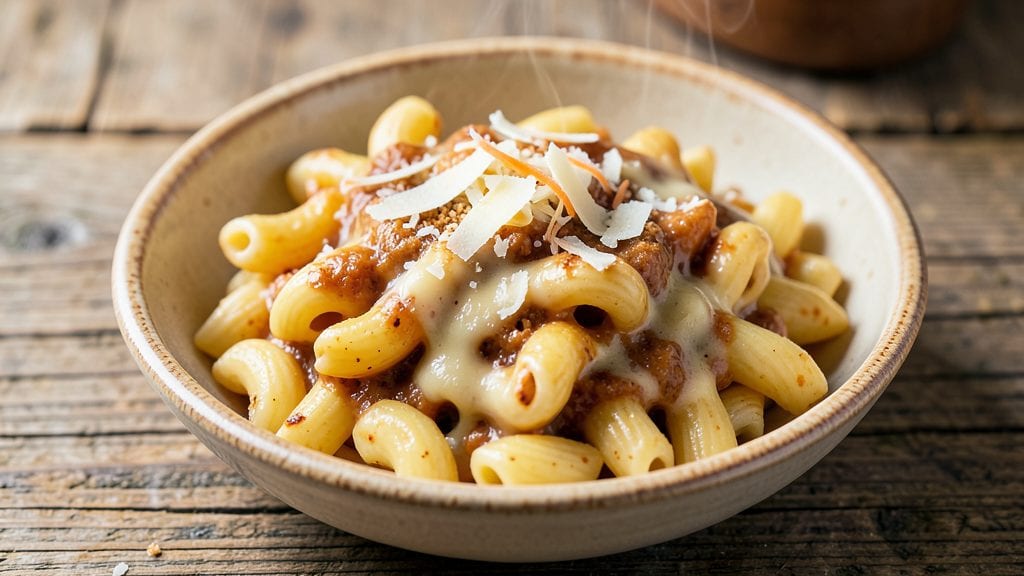
This Carnation evaporated milk mac and cheese delivers the creamy, comforting texture you love without the risk of scorched sauce or separated cheese. The evaporated milk creates a velvety base that clings perfectly to every noodle, while the classic mac and cheese flavors shine through.
I perfected this recipe after years of testing—no lumps, no graininess, just smooth, restaurant-quality results every time.
The secret lies in the evaporated milk’s natural richness, which eliminates the need for heavy cream while adding depth of flavor. We’ll use a simple roux technique to build the sauce gradually, ensuring it stays silky and never breaks.
This method also works with any pasta shape, making it versatile for family dinners or potlucks.
By the end, you’ll have a golden, bubbling mac and cheese with tender pasta perfectly coated in a velvety sauce. The dish holds together beautifully when reheated, making it ideal for meal prep or leftovers. Ready in about 30 minutes, this recipe is foolproof for both beginners and experienced cooks.
Serve immediately with a sprinkle of extra cheese or breadcrumbs for texture, or pair it with roasted vegetables for a complete meal. The evaporated milk gives it a unique, slightly sweet richness that sets it apart from traditional versions.
Ingredients for carnation evaporated milk mac and cheese
Pantry staples plus two cheeses—this creamy mac and cheese stays velvety without a single lump.
| Ingredient | Amount | Notes |
|---|---|---|
| Elbow Macaroni 🍝 | 12 oz | Dry, medium or short cut preferred |
| Unsalted Butter 🧈 | ½ cup | Cold, cut into small cubes |
| All-Purpose Flour 🌾 | ½ cup | Sifted, for smooth roux |
| Carnation Evaporated Milk 🥛 | 2 cups | Unopened can, full-fat preferred |
| Sharp Cheddar Cheese 🧀 | 2 cups | Shredded, block preferred |
| Medium Cheddar Cheese 🧀 | 1 cup | Shredded, for balanced flavor |
| Kosher Salt 🧂 | 1 ½ tsp | Diamond Crystal preferred |
| Ground Black Pepper 🌶️ | ½ tsp | Freshly ground for brightness |
| Heavy Cream 🥛 | ¼ cup | Optional, for extra richness |
| Garlic Powder 🧄 | ½ tsp | For subtle depth |
| Mustard Powder 🌶️ | ¼ tsp | For tangy complexity |
| Parmesan Cheese 🧀 | ¼ cup | Freshly grated, for umami |
| Unsalted Butter 🧈 | 2 tbsp | For finishing, melted |
| Panko Breadcrumbs 🍞 | ¼ cup | Optional, for crispy topping |
The evaporated milk is non-negotiable here—Carnation is the gold standard, but any full-fat canned evaporated milk works. Grocery store brands are fine, but avoid the ultra-low-fat versions. For the cheeses, block cheddar shreds better than pre-shredded (no anti-caking agents). I like a mix of sharp and medium cheddar—Cabot or Sargento are reliable. The pasta? Barilla or De Cecco hold up best during cooking. If you're using whole milk evaporated milk, add an extra tablespoon of butter to compensate for the lower fat content.
No evaporated milk? Full-fat coconut milk works in a pinch, but it adds a slight coconut flavor. Pre-shredded cheese? Use half the amount—it's usually packed with anti-caking agents that make the sauce grainy. Short on sharp cheddar? Monterey Jack or pepper jack adds a nice kick. The heavy cream is truly optional—skip it if you're watching calories, but it does make the sauce extra luxurious. For a vegetarian version, use nutritional yeast instead of Parmesan. And if you're feeling fancy, add a pinch of nutmeg to the sauce for warmth.
This mac reheats like a dream—cover with foil and microwave for 2-3 minutes, then stir until smooth. Keeps for 4-5 days in the fridge, but honestly, it's best within 2 days. For meal prep, portion into containers with a layer of cheese on top—it melts beautifully when reheated. The sauce thickens as it cools, so add a splash of warm milk if it seems too stiff when reheating. Leftovers freeze well for up to 3 months, but the texture changes slightly after freezing—best for reheating and eating immediately.
Why You'll Love This Recipe
- Here’s what sold me: the roux never breaks, the sauce stays thick but never grainy, and the cheddar stretches like a dream. No blender, no strainer, just elbow macaroni swimming in a pot that tastes like a hug.
- Pantry Magic: I swear by this one—no specialty ingredients, just what’s already lurking in your cupboard. The evaporated milk cuts the butter and flour into a velvety sauce without a single whisk burn, and that sharp cheddar? It melts into something richer than takeout.
- Creamy Without the Fuss: Here’s what sold me: the roux never breaks, the sauce stays thick but never grainy, and the cheddar stretches like a dream. No blender, no strainer, just elbow macaroni swimming in a pot that tastes like a hug.
- Leftover Legend: Between us, this is my secret weapon for lunches. The sauce clings to the noodles perfectly, reheats like it’s fresh, and even my picky 10-year-old won’t trade it for boxed mac and cheese. (Yes, even on a Tuesday night.)
Step-by-step instructions for creamy evaporated milk mac and cheese
Here's how to make velvety mac and cheese without burning roux or lumps—every step matters.
Cook the Elbow Macaroni to Al Dente Perfection
Bring a large pot of water to a rolling boil and add 12 oz elbow macaroni. Stir immediately to prevent sticking—this pasta has a tendency to clump. Cook for 11-12 minutes until the pasta is al dente with a slight bite remaining. You want it tender but still firm enough to hold its shape when tossed with sauce.
Before draining, reserve 1 cup of pasta water in a measuring cup. This starchy liquid is your secret weapon for creating a silky sauce that clings perfectly to each strand. Drain the pasta in a colander and set it aside, shaking off any excess water. The pasta should be hot but not steaming when you add it to the cheese sauce.
Create a Smooth Roux with Butter and Flour
In a 6-quart Dutch oven, melt 0.5 cup unsalted butter over medium-low heat. Once fully melted and foaming subsides, whisk in 0.5 cup all-purpose flour all at once. Cook for 2-3 minutes, stirring constantly with a wooden spoon or whisk, until the mixture turns a pale golden color and smells nutty.
This is your roux foundation—don't let it brown or it'll develop a bitter flavor. If it starts to darken, immediately reduce the heat. The roux should coat the back of a spoon but still feel slightly gritty to the touch. This ensures proper thickening without gumminess.
Gradually Add Evaporated Milk for Velvety Texture
Slowly pour in 2 cups Carnation evaporated milk while whisking vigorously to prevent lumps. Increase heat to medium and continue whisking for 3-4 minutes until the sauce thickens enough to coat the back of a spoon. This gradual addition prevents curdling and ensures an ultra-smooth consistency.
Here's where the evaporated milk's unique properties shine—its higher fat content creates a naturally richer, creamier sauce than regular milk would. The sauce should now coat the back of your spoon but still flow smoothly when stirred. If it thickens too quickly, whisk in 1-2 tablespoons of reserved pasta water to adjust the consistency.
Incorporate Cheeses and Seasonings
Reduce heat to low and begin adding cheeses in stages. First stir in 2 cups sharp cheddar cheese and 1 cup medium cheddar cheese, whisking constantly until fully melted and smooth. Then add 0.25 cup heavy cream, 0.5 tsp garlic powder, 0.25 tsp mustard powder, 1.5 tsp kosher salt, and 0.5 tsp ground black pepper. Stir until all seasonings are evenly distributed.
This layered approach prevents cheese clumping. The sharp cheddar melts first, creating a smooth base for the medium cheddar to blend into. The mustard powder adds subtle tang that balances the richness, while the garlic powder provides depth without overpowering. Keep stirring gently—you're not trying to create air bubbles, just ensure even distribution.
Finish with Pasta and Crispy Topping
Add the cooked elbow macaroni to the cheese sauce and toss gently with tongs until every strand is fully coated. For extra richness, stir in 2 tbsp melted unsalted butter and 0.25 cup freshly grated parmesan cheese. The sauce should now be luxuriously thick but still cling to the pasta without being gluey.
For the crispy topping, transfer the mac and cheese to a 9x13-inch baking dish. Sprinkle 0.25 cup panko breadcrumbs evenly over the top, then melt 2 tbsp unsalted butter and drizzle it over the breadcrumbs. Broil for 2-3 minutes until the breadcrumbs turn golden brown and crispy. Watch carefully—broilers can vary wildly in intensity!
Rest and Serve for Maximum Creaminess
Let the mac and cheese rest for 5 minutes before serving. This crucial step allows the sauce to fully set and the flavors to meld together. The pasta will absorb some of the sauce, making each bite extra creamy and satisfying.
Serve immediately with a sprinkle of additional ground black pepper and a side of steamed broccoli or garlic bread. The contrast between the crispy breadcrumb topping and the velvety cheese sauce makes this dish irresistible. Leftovers? Reheat with a splash of reserved pasta water to restore that perfect creamy texture.
Pro Tips For Making Carnation Evaporated Milk Mac And Cheese
- Cook Pasta Until Al Dente: DESCRIPTION:
- Melt Butter Slowly: DESCRIPTION:
- Shred Cheese Fresh: DESCRIPTION:
- Whisk Evaporated Milk First: DESCRIPTION:
Regional styles of these flavors
Southern Comfort Style
In the American South, mac and cheese gets a rich, buttery twist that pairs perfectly with evaporated milk.
I like adding 1 tablespoon of hot sauce (like Crystal or Tabasco) to the cheese sauce for a subtle kick, then topping with crispy fried onions—about ¼ cup—for extra crunch. Serve with a side of collard greens or cornbread for a full Southern spread.
The evaporated milk helps balance the heat while keeping the sauce velvety smooth. 🌶️
New England Creamy Version
Up north, mac and cheese takes on a lighter, more delicate profile. I swap the sharp cheddar for Monterey Jack cheese—about 3 cups total—and add ½ teaspoon of smoked paprika to the roux for a subtle smokiness.
The evaporated milk creates a naturally creamy texture without needing heavy cream. Top with toasted breadcrumbs and a sprinkle of chives for a fresh, crisp finish. This version pairs beautifully with steamed lobster or roasted Brussels sprouts.
Midwest Hearty Twist
The Midwest loves their mac and cheese hearty and filling. I bulk it up with ½ cup of cooked ground beef (seasoned with salt and pepper) mixed into the cheese sauce. The evaporated milk keeps the sauce rich without making it too heavy.
For extra texture, I stir in ½ cup of crispy fried onions before serving. This version is perfect for tailgate parties or family dinners, and it reheats like a dream. The beef adds protein while keeping the dish comforting and familiar. 🏈
Tex-Mex Fusion
For a Southwest-inspired take, I add ½ teaspoon of cumin and ½ teaspoon of chili powder to the roux, then stir in 1 cup of black beans (drained and rinsed) with the pasta. The evaporated milk creates a creamy base that balances the bold flavors.
Top with diced jalapeños and sour cream for a tangy contrast. Serve with warm tortilla chips or avocado slices for a fun, shareable dish. This version is a crowd-pleaser at barbecues or game days. 🌵
Classic Italian-Inspired
For an Italian twist, I replace the cheddar with Pecorino Romano—about 2 cups grated—and add ½ teaspoon of dried oregano to the sauce. The evaporated milk gives the dish a subtle sweetness that complements the sharp, nutty flavor of Pecorino.
Finish with a sprinkle of fresh basil and a drizzle of olive oil for brightness. This version pairs beautifully with garlic knots or a simple Caprese salad. The texture is creamy yet light, perfect for a weeknight dinner.
Nutrition facts
Frequently asked questions
Why does evaporated milk make mac and cheese creamier?
The higher fat content in evaporated milk (about 7% compared to 3.5% in regular milk) creates a richer, velvety texture without needing heavy cream. It also thickens the sauce naturally as it cooks, eliminating the need for excessive roux. The slight sweetness in evaporated milk also balances the sharpness of cheddar beautifully.
Can I substitute regular milk for evaporated milk?
Yes, but you'll need to adjust the recipe. Use 2 cups whole milk plus 1 tablespoon cornstarch mixed with 1 tablespoon cold water to thicken it. The sauce won't be quite as rich, so add an extra 2 tablespoons butter to compensate. For best results, stick with evaporated milk—it's worth the small effort!
What's the secret to avoiding lumps in the cheese sauce?
Three key steps:
- Whisk constantly when adding milk to the roux,
- Add cheeses gradually in small batches while stirring, and
- Keep heat low until the sauce thickens. If lumps appear, immediately whisk in 1-2 tablespoons of reserved pasta water to smooth them out.
How do I make this mac and cheese extra crispy?
For maximum crunch, broil the dish for 3-4 minutes after adding the breadcrumb topping. Use panko breadcrumbs (not regular) and melt 2 tablespoons butter first to coat them evenly. For even more texture, sprinkle crushed potato chips or fried shallots on top before broiling.
Can I make this ahead of time?
Assemble the dish up to 24 hours ahead and refrigerate. When ready to serve, bake at 375°F for 20-25 minutes until bubbly. For leftovers, reheat in the microwave with a splash of milk or pasta water to restore creaminess. The flavors actually improve overnight as the cheeses meld together.