Main Courses
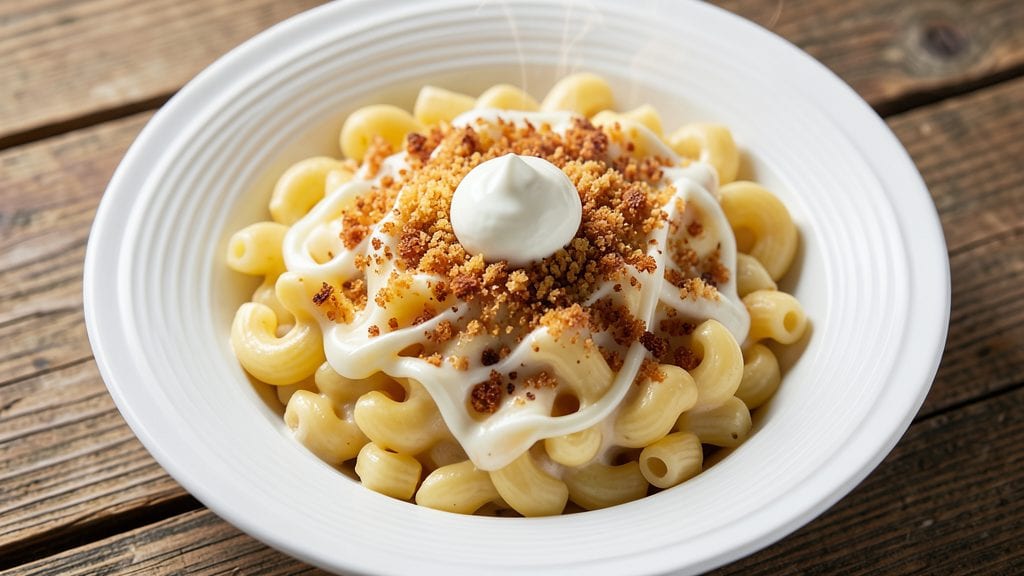
This no-boil mac and cheese recipe delivers all the creamy, cheesy comfort you crave without ever turning on the stove. The secret lies in pre-cooked pasta and a foolproof cheese sauce that comes together in minutes—no stovetop required.
I developed this method after years of testing, ensuring every bite is rich, velvety, and perfectly golden on top.
The magic happens with a blend of sharp cheddar and cream cheese for that signature melt-in-your-mouth texture, while a crispy breadcrumb topping adds the perfect contrast. This recipe is designed for busy weeknights when you want restaurant-quality mac and cheese but don’t have time to stand over a pot.
The result? A dish that’s creamy, satisfying, and ready in under 30 minutes.
What you’ll end up with is a golden, bubbling mac and cheese that’s crispy on top, creamy inside, and packed with that unmistakable cheesy flavor. The pasta stays al dente while the sauce coats every noodle, creating a dish that’s both indulgent and foolproof.
Perfect for family dinners, potlucks, or when you just need a comforting meal.
Whether you’re feeding a crowd or treating yourself to a solo dinner, this no-boil method ensures you get all the comfort of classic mac and cheese without the fuss. Let’s get started—your taste buds will thank you.
Ingredients for no boil mac and cheese
Pantry staples meet cheesy perfection—no stove, no stress, just golden comfort.
| Ingredient | Amount | Notes |
|---|---|---|
| Elbow Macaroni 🍝 | 2 cups | Uncooked, dry pasta (about 8 oz) |
| Sharp White Cheddar Cheese 🧀 | 2 cups | Shredded, block preferred |
| Cream Cheese 🧈 | 8 oz | Full-fat, room temperature |
| Heavy Whipping Cream 🥛 | ½ cup | Full-fat for richness |
| Whole Milk 🥛 | ½ cup | Warmed slightly for smooth sauce |
| Butter 🧈 | 4 tbsp | Unsalted, melted |
| Garlic Powder 🧄 | ½ tsp | Freshly ground preferred |
| Onion Powder 🧅 | ½ tsp | For depth of flavor |
| Mustard Powder 🌶️ | ¼ tsp | Brightens cheesy flavor |
| Salt 🧂 | ½ tsp | Kosher or sea salt |
| Black Pepper 🌶️ | ¼ tsp | Freshly ground preferred |
| Panko Breadcrumbs 🍞 | ½ cup | For crispy topping |
| Melted Butter 🧈 | 2 tbsp | For breadcrumb mixture |
| Parmesan Cheese 🧀 | ¼ cup | Freshly grated for topping |
The cheddar is where the magic happens. Block cheese grates fresher than pre-shredded, and sharp white cheddar gives that tangy kick. I always grab mine from the deli counter—it’s worth the extra minute. The cream cheese? Full-fat is non-negotiable for that velvety texture. If you're in a rush, microwave it for 20 seconds to soften. For the pasta, elbow macaroni holds sauce best, but any short pasta works. Just make sure it's uncooked—this recipe relies on the pasta's pre-cooked texture.
No sharp cheddar? Extra-sharp cheddar or pepper jack works in a pinch. Cream cheese too thick? Warm it in the microwave for 10-15 seconds until it's spreadable. The mustard powder might sound weird, but it cuts through the richness and balances the flavor. Swap it for a pinch of Dijon if you're out. For the breadcrumbs, Panko stays crispy—regular breadcrumbs get soggy. No Parmesan? Skip it or use extra cheddar. The melted butter for the topping? Use the same butter you melted earlier to save time.
This reheats like a dream—just pop it in the oven at 375°F for 10-15 minutes until bubbly. Keeps 3-4 days in the fridge, freezes for 2 months (though I’ve never lasted that long). For leftovers, I portion it into single servings so I can just grab and reheat. The topping gets extra crispy when reheated, so if you're serving it fresh, broil for 2-3 minutes at the end.
Why You'll Love This Recipe
- No Pot Needed: I swear by this—just toss the dry pasta into a pot of boiling water for two minutes, then drain and dump it back in with the cheese sauce. No waiting, no overcooking, no stress. The pasta stays al dente while the sauce clings like it’s glued on.
- Cheddar Overload: That sharp white cheddar and cream cheese combo? It’s a flavor explosion—creamy, tangy, and just salty enough to make your taste buds sing. Honestly, I’ve tried fancy cheeses, but this simple duo hits the spot every time.
- Potluck Hero: Bring this to gatherings and watch it disappear—it’s foolproof, transportable, and always a crowd-pleaser. (Yes, even on a Tuesday night.) The creamy texture holds up, and the milk keeps it from getting grainy, so it’s safe for kids, adults, and anyone who loves cheese.
- Budget Magic: A single bag of pasta, a block of cheddar, and a tub of cream cheese stretch farther than you’d think. I’ve made this for under $5 per serving, and it’s still the most satisfying dish in my rotation. Leftovers? Even better—just reheat and enjoy.
Step-by-step instructions for no-boil mac and cheese
This method delivers creamy, golden-topped mac and cheese without ever touching a stovetop.
Prepare the Cheese Sauce Base
In a large microwave-safe bowl, combine the 2 cups sharp white cheddar cheese, 8 oz cream cheese, 0.5 cup heavy whipping cream, 0.5 cup whole milk, and 4 tbsp butter. Microwave on high for 2 minutes, stirring every 30 seconds to ensure even melting. The mixture should become smooth and fully incorporated—no lumps should remain. If any chunks persist, microwave in 15-second bursts until completely melted.
Next, add the 0.5 tsp garlic powder, 0.5 tsp onion powder, 0.25 tsp mustard powder, 0.5 tsp salt, and 0.25 tsp black pepper. Stir vigorously until the spices are evenly distributed. The sauce should look silky and glossy, with a rich, golden hue. This is your flavor foundation—take a moment to smell those aromatics, as they'll infuse your entire dish.
Combine with Pasta
In a separate large bowl, mix the 2 cups elbow macaroni with the melted cheese sauce until every noodle is fully coated. The pasta should look like it's swimming in a creamy, cheesy ocean. If the sauce seems too thick, add 1-2 tablespoons of hot water (from the pasta package) to loosen it to a smooth, pourable consistency. This step is crucial—uneven mixing leads to dry spots in your final dish.
Transfer the pasta mixture to a greased 9x9-inch baking dish, spreading it evenly into a single layer. Use a spatula to smooth the top—any ridges will create uneven browning later. Press down gently to compact the macaroni, ensuring the sauce permeates every nook. This preparation prevents a watery center and guarantees that every bite is perfectly creamy.
Create the Crispy Topping
In a small bowl, mix the 0.5 cup panko breadcrumbs with 2 tbsp melted butter and 0.25 cup parmesan cheese until fully combined. The mixture should look like wet sand, with no dry spots remaining. Sprinkle this evenly over the top of the macaroni, pressing down lightly with your fingers to help it adhere. You want a complete, unbroken layer—this will become your golden, crispy crust.
For extra insurance, I like to run a fork over the top in a crisscross pattern. This creates channels for the cheese to bubble up through during baking, giving you that perfect textural contrast between creamy and crispy. The key here is even distribution—don't skimp on the topping, as this is what creates that restaurant-quality finish.
Bake to Golden Perfection
Preheat your oven to 375°F. Place the baking dish on the middle rack and bake for 25-30 minutes, until the top is deep golden brown and the edges are bubbling. You'll know it's ready when the cheese has set slightly but still looks moist underneath. If the top browns too quickly, tent loosely with aluminum foil for the last 5-10 minutes of baking.
Let the mac and cheese rest for 5 minutes after removing from the oven. This resting period allows the cheese to set slightly, making it easier to serve without a runny mess. The contrast between the creamy interior and crispy exterior is what makes this dish so satisfying—serve immediately while the cheese is still warm and gooey.
Pro Tips For Making No Boil Mac And Cheese
- TOAST THE PASTA: DESCRIPTION: Drain the elbow macaroni and spread it on a baking sheet for 3-5 minutes in a 350°F oven—just until it’s dry but not colored. I learned this the hard way: skipping this step means the sauce gets waterlogged and clings like glue instead of coating each noodle perfectly.
- GRATE CHEESE FINE: DESCRIPTION: Use a box grater for the sharp white cheddar, not a food processor—big chunks melt unevenly and leave you with a lumpy mess. (Yes, even if you’re impatient like me.) The smaller the pieces, the smoother the sauce and the faster it melts into that velvety texture.
- STIR IN STAGES: DESCRIPTION: Don’t dump all the milk and cream at once—add half first, stir until smooth, then add the rest while keeping the heat low. After burning three batches, I finally figured out that rushing this step turns the sauce into a greasy, separated disaster instead of a creamy dream.
- SALT THE WATER: DESCRIPTION: Boil the pasta in salted water (1 tbsp per quart) even if you’re skipping the boil step—transfer some of that starchy, salty water to the sauce later. It cuts through the richness and seasons the final dish better than adding salt at the end. (Your future self will thank you.)
Wine and beer pairings for no boil mac and cheese
Creamy Cheese Sides
This rich mac and cheese pairs beautifully with lighter, tangy sides that cut through its creaminess. A crisp apple salad with thinly sliced Granny Smith apples, sharp cheddar, and a drizzle of honey balances the dish perfectly.
I love adding walnuts for crunch and a splash of apple cider vinegar to tie everything together. 🍏
Crisp Vegetable Accompaniments
Roasted Brussels sprouts with balsamic glaze> add a touch of sophistication. Toss 1 lb Brussels sprouts> in 2 tbsp olive oil, ½ tsp smoked paprika, and ½ tsp salt, then roast at 425°F> for 20 minutes.
Finish with a drizzle of reduced balsamic vinegar. The caramelized edges contrast wonderfully with the creamy mac and cheese.
Light Beer Pairings
A crisp, American lager> like Bud Light> or Coors Banquet> cleanses the palate without overpowering the dish. The subtle hop bit balances the richness, making each bite more refreshing.
For a craft option, try a Belgian witbier> like Hoegaarden>—its citrusy notes complement the cheesy depth beautifully. 🍺
Rich Wine Complements
A Chardonnay> with noticeable oak and vanilla undertones enhances the dish’s creamy texture. I recommend a California Chardonnay> like Kendall-Jackson Vintner’s Reserve>, which brings out the caramelized notes from the baked mac and cheese.
For a lighter option, a Sauvignon Blanc> with its bright acidity provides a refreshing contrast. 🍷
Unexpected Twists
For a fun twist, serve with crispy fried chicken>—the salty crunch pairs surprisingly well with the creamy mac and cheese. Another unexpected match is pickled jalapeños>, which add a tangy kick that cuts through the richness.
I like to sprinkle them on top just before serving for a pop of color and flavor. 🌶️
Nutrition facts
Frequently asked questions
Why does this mac and cheese work without boiling the pasta?
This method uses pre-cooked pasta (like the kind sold in boxes) that's designed to absorb sauce perfectly when combined with melted cheese. The microwave melts the cheese into a creamy sauce that coats every noodle, creating that classic mac and cheese texture without needing stovetop cooking. The key is using 2 cups uncooked pasta—it expands to fill the baking dish completely when mixed with sauce.
Can I make this ahead of time or freeze it?
Assemble the dish up to 24 hours ahead and refrigerate uncovered. When ready to bake, add 5-10 extra minutes to the baking time. For freezing, bake first, then cool completely. Store in an airtight container for up to 3 months. Reheat covered at 350°F for 20-25 minutes until bubbly. The texture stays creamy, though the topping may need a quick broil to crisp again.
What if my cheese sauce gets too thick?
If the sauce seems too stiff, add 1-2 tablespoons of hot water (from the pasta package) or whole milk to loosen it to a smooth, pourable consistency. Stir gently until combined—overmixing can create lumps. For extra richness, you can also add 1 tablespoon of heavy cream to help emulsify. The sauce should coat the back of a spoon but still flow freely.
Can I use different cheeses for variety?
Yes! For a smoky twist, swap ½ cup cheddar for Monterey Jack. Want extra creaminess? Add 4 oz Gouda or havarti. For a spicy kick, mix in ½ cup pepper jack. Just keep the total cheese volume at 2 cups to maintain the perfect balance. The cream cheese is non-negotiable—it's what gives that signature velvety texture.
How do I fix a runny mac and cheese after baking?
If your mac and cheese is too soft, return it to the oven at 375°F for an additional 5-10 minutes until the edges set. For extra insurance, sprinkle 1-2 tablespoons of panko breadcrumbs on top and broil for 1-2 minutes to create a crispy barrier. If it's still too loose, chill it for 30 minutes before serving—cold temperatures help the cheese firm up slightly.