Main Courses
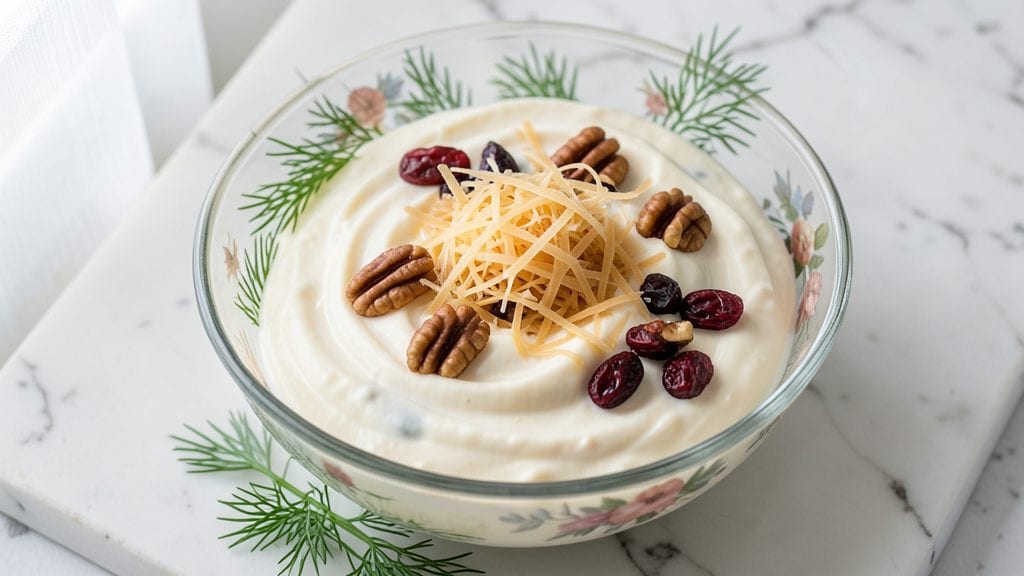
This Philadelphia cream cheese cheese ball recipe with sour cream is the ultimate no-fuss party bite that comes together in just 15 minutes—no baking, no fuss, and no one will believe it’s this easy.
I developed this recipe after realizing how often we skip homemade appetizers because they’re too complicated, and this one proves you don’t need fancy techniques to make something crowd-pleasing.
The sour cream adds a tangy richness that keeps the texture creamy without being greasy, while the cream cheese delivers that classic, velvety bite.
The beauty of this recipe lies in its simplicity: just mix, shape, and chill. You’ll start with a base of softened cream cheese and sour cream, then fold in your choice of mix-ins—think chopped nuts, dried cranberries, or fresh herbs.
The key is letting it set in the fridge for at least an hour, which gives it that perfect firm-yet-creamy texture that holds up beautifully when sliced. It’s the kind of dish that disappears fast, so make a big batch and thank me later.
What you’ll end up with is a foolproof, restaurant-worthy appetizer that’s perfect for game day, holiday gatherings, or even a casual get-together. The flavor is rich and satisfying, the texture is smooth and slightly tangy, and the presentation is effortlessly elegant.
Plus, it’s a great way to use up pantry staples without breaking a sweat. Ready to make your next party the talk of the town? Let’s get started.
This cheese ball keeps well in the fridge for up to a week, so you can prep ahead and enjoy stress-free entertaining. Serve it with crackers, sliced apples, or even on its own—it’s that good.
And don’t be afraid to get creative with your mix-ins; the possibilities are endless. Here’s everything you need to make it happen.
Ingredients for easy philadelphia cream cheese cheese ball recipe with sour cream
Just 12 ingredients transform into this crowd-pleasing cheese ball that’s ready in 15 minutes.
| Ingredient | Amount | Notes |
|---|---|---|
| Philadelphia Cream Cheese 🧀 | 16 oz | Full-fat, softened to room temperature |
| Sour Cream 🥛 | ½ cup | Full-fat, slightly thickened |
| Shredded Parmesan Cheese 🧀 | 1 cup | Freshly grated from block |
| Chopped Pecans 🥜 | ½ cup | Toasted lightly for extra flavor |
| Dried Cranberries 🍇 | ¼ cup | Chopped if large, for sweet contrast |
| Fresh Dill 🌿 | 2 tbsp | Finely chopped, stems removed |
| Garlic Powder 🧄 | 1 tsp | For subtle depth |
| Salt 🧂 | ½ tsp | Kosher or sea salt |
| Black Pepper 🌶️ | ¼ tsp | Freshly ground for warmth |
| Almond Flakes 🥜 | ¼ cup | For coating, optional but pretty |
| Paprika 🌶️ | ½ tsp | Smoked for color and flavor |
| Butter 🧈 | 1 tbsp | Softened, for shaping |
The cream cheese is the star—Philadelphia brand is non-negotiable here. Grab the full-fat version (8 oz blocks work best) and let it sit out for 15 minutes before mixing. Trader Joe's and Wegmans always have great stock, and I swear by the 16 oz tubs for parties. The sour cream adds that tangy richness, so don’t skimp—full-fat is key for that velvety texture. For the Parmesan, freshly grated from a block makes all the difference (pre-shredded gets clumpy). Pecans and cranberries are pantry staples, but if you’re feeling fancy, toasted walnuts or candied nuts work too.
No pecans? Chopped almonds or cashews are great substitutes—they’re sweeter but still add crunch. Short on dill? Fresh parsley or chives at the same amount give a bright pop. Want more savory? Swap half the cranberries for crumbled bacon or sun-dried tomatoes. The garlic powder and black pepper are non-negotiable for that subtle depth, but if you’re feeling bold, add a pinch of cayenne for a little kick. The butter at the end helps bind everything together—don’t skip this step**—it makes shaping so much easier.
This cheese ball tastes even better after it’s had time to set—at least 2 hours in the fridge (overnight is ideal). Store it in an airtight container with parchment paper between layers to keep it fresh. It stays good for up to 1 week, but trust me, it won’t last that long. For serving, roll it in extra almond flakes or paprika right before guests arrive—instant party upgrade! Leftovers? Pop them in the freezer for up to 3 months—just thaw in the fridge overnight.
Why You'll Love This Recipe
- No Mixing Madness: Between us, this cheese ball doesn’t need a food processor. I just crumble the cream cheese and sour cream with my hands—no lumps, no stress. The Parmesan shreds right in, and the pecans and cranberries stay chunky for that textural win everyone loves.
- Sweet-Savory Magic: That first bite? Creamy, tangy, with a crunch that hits just right. The sour cream keeps it rich but not heavy, while the pecans and cranberries add a surprising depth—like a holiday dessert and a charcuterie board had a baby.
- Party on a Plate: Honestly, this is my go-to for gatherings because it actually feeds a crowd. Roll it in crushed nuts or extra Parmesan, slice it up, and boom—elegant appetizer with zero fuss. (Yes, even on a Tuesday night.)
- Make-Ahead Miracle: I make a double batch every time because it keeps perfectly for a week in the fridge. The flavors meld even better, and it’s the ultimate lazy-day snack—no reheating, no second-guessing. Just grab and go.
Step-by-step instructions for Philadelphia cream cheese cheese ball
This no-fuss cheese ball comes together in minutes and packs serious flavor—perfect for any party spread!
Mix the Cream Cheese Base
In a large mixing bowl, combine the 16 oz Philadelphia Cream Cheese and 0.5 cup Sour Cream. Use a hand mixer or wooden spoon to beat until completely smooth and creamy. I like to press the cream cheese against the bowl sides to ensure it incorporates fully—this prevents any lumps that can happen with cold cream cheese.
Next, add the 1 cup Shredded Parmesan Cheese, 2 tbsp Fresh Dill, 1 tsp Garlic Powder, 0.5 tsp Salt, and 0.25 tsp Black Pepper. Mix again until everything is evenly distributed. The mixture should look like wet sand—thick but still pliable. If it feels too sticky, you can add a pinch more Parmesan, but don't worry if it's still soft; it will firm up as we work with it.
Fold in the Crunchy Add-Ins
Gently fold in the 0.5 cup Chopped Pecans and 0.25 cup Dried Cranberries using a spatula. Be careful not to overmix—just combine until evenly distributed. The cranberries add a sweet contrast to the savory cream cheese, while the pecans give that satisfying crunch. I like to keep a few whole cranberries on the side for garnish if I want a pretty presentation later.
Here's where it gets fun—sprinkle the 0.5 tsp Paprika over the mixture and gently fold it in. The paprika adds a beautiful color and subtle smoky flavor that ties everything together. If you're using the 0.25 cup Almond Flakes for coating, set them aside for now—we'll use them later to create that gorgeous golden crust.
Shape and Chill the Cheese Ball
Take the mixture and gently form it into a ball shape in your hands. It's okay if it's not perfect—this isn't a competition, after all! Place the ball on a plate and smooth out any rough edges. Then, take the 1 tbsp Butter and rub it all over the surface of the ball. This butter coating will help create that beautiful golden crust when we add the almond flakes.
Press the 0.25 cup Almond Flakes firmly onto the butter-coated ball, covering it completely. Use your hands to press the flakes into the butter so they stick well. Place the cheese ball in the refrigerator and let it chill for at least 1 hour. This chilling time is crucial—it allows the cheese ball to firm up and the flavors to meld together beautifully. You can even leave it overnight if you're making this ahead of time.
Serve and Enjoy
Once the cheese ball is firm and chilled, it's ready to serve! Remove it from the refrigerator and slice it into wedges using a sharp knife. The almond flake crust should hold together nicely, giving each bite that perfect combination of creamy, crunchy, and tangy flavors.
This cheese ball keeps well in the refrigerator for up to 1 week, making it perfect for parties or gatherings. Serve it with toothpicks for easy grabbing, and watch it disappear quickly—it's that good! The balance of creamy, crunchy, and slightly sweet elements makes this a crowd-pleaser every time. Enjoy your no-fuss, party-ready cheese ball!
Pro Tips For Making Easy Philadelphia Cream Cheese Cheese Ball Recipe With Sour Cream
- SOFTEN CREAM CHEESE FIRST: Take the Philadelphia cream cheese out of the fridge at least 30 minutes before mixing—room temperature cheese blends smoother and avoids lumps. I used to force it straight from the fridge, and the result was always grainy, no matter how hard I stirred.
- DRY THE PARMESAN: Pat shredded Parmesan with a paper towel to remove excess moisture—wet cheese makes the ball soggy. I learned this after my first batch turned into a sticky mess within hours.
- TOAST THE PECANS: Lightly toast the chopped pecans in a dry pan for 2-3 minutes until fragrant—this adds depth and prevents them from getting mushy. Skip this, and they’ll just sit there like dry, flavorless chips.
- CHILL THE MIX BEFORE SHAPING: Refrigerate the cheese-sour cream blend for 15 minutes before rolling it into a ball—it’ll hold shape better and won’t crumble when you add the toppings. I used to rush it, and the whole thing fell apart when I pressed the pecans on top.
Storing and reheating this easy philadelphia cream cheese cheese ball recipe with sour cream
Fridge Storage Tips
Store your cheese ball in an airtight container with parchment paper between layers to prevent sticking. I like using glass Pyrex containers because they stack neatly in the fridge and keep the cheese ball fresh for up to 1 week.
The sour cream and cream cheese base will firm up beautifully during this time, making slices hold their shape perfectly. 🧀
If you're prepping ahead, let it chill for at least 2 hours before serving—this ensures the almond flake coating stays crisp. I often make mine the night before parties so it's ready to slice and serve without any last-minute stress.
The flavors actually meld better after chilling, so patience pays off here.
Freezer-Friendly Trick
This cheese ball freezes surprisingly well for up to 3 months—great for holiday parties or unexpected gatherings. Wrap it tightly in plastic wrap first, then place in a freezer bag with all the air squeezed out.
When you're ready to serve, thaw it in the fridge overnight for the best texture. The butter coating helps protect the cheese from freezer burn, so you won't lose any of that creamy goodness.
Reheating for Best Texture
If you've stored leftovers in the fridge, simply let them sit at room temperature for 15-20 minutes before serving. The cheese ball will soften slightly but maintain its structure.
For a quick refresh, I sometimes pop it in the microwave for 10-15 seconds on low power if it's been in the fridge too long—just enough to loosen it up without melting the almond flakes. 🔥
Serving After Storage
After refrigeration or freezing, the cheese ball might need a quick refresh before serving. Press the almond flakes back onto the surface if they've loosened, and give it a light dusting of paprika for that restaurant-quality finish.
The butter coating will make the flakes stick beautifully, giving each slice that satisfying crunch. Serve with toothpicks for easy grabbing—guests will disappear with it in minutes.
Make-Ahead Magic
This is one of those rare appetizers that actually tastes better the next day. The sour cream and cream cheese flavors deepen, and the mix-ins become more integrated. I make mine 2-3 days ahead for gatherings because it's one less thing to worry about on the day of.
Just store it properly, and you'll have a foolproof party starter that requires zero effort at the last minute. ✨
Nutrition facts
Frequently asked questions
Why does this recipe use sour cream instead of just cream cheese?
The sour cream adds a tangy richness that balances the creaminess of the Philadelphia cheese. It also helps create a smoother texture that holds its shape better when chilled. Without it, the cheese ball can turn out too dense or greasy.
Can I make this cheese ball without nuts?
Skip the pecans or almond flakes and use sunflower seeds, dried fruit, or even crispy fried shallots for texture. For a savory version, try adding crispy bacon bits or jalapeños. The key is maintaining some crunch to contrast the creamy base.
How do I fix a cheese ball that's too soft after chilling?
If it's still too soft, return it to the fridge for another 30-60 minutes. For immediate firming, place it in the freezer for 10-15 minutes—just don't freeze it solid. The butter coating helps, but if needed, press extra almond flakes or crushed crackers on top to add structure.
What's the best way to serve this cheese ball?
Slice into wedges and serve with toothpicks for easy grabbing. Pair with sliced apples, crusty bread, or veggie sticks. For a fancy touch, drizzle with honey or balsamic glaze. The almond flake coating makes it perfect for holiday parties or game day spreads.
Can I make this gluten-free?
Yes! Just ensure your almond flakes are certified gluten-free and use gluten-free crackers if serving with them. The base ingredients are naturally gluten-free, so this version works perfectly for gluten-sensitive guests. Always check labels on all add-ins to be safe.