
Snacks
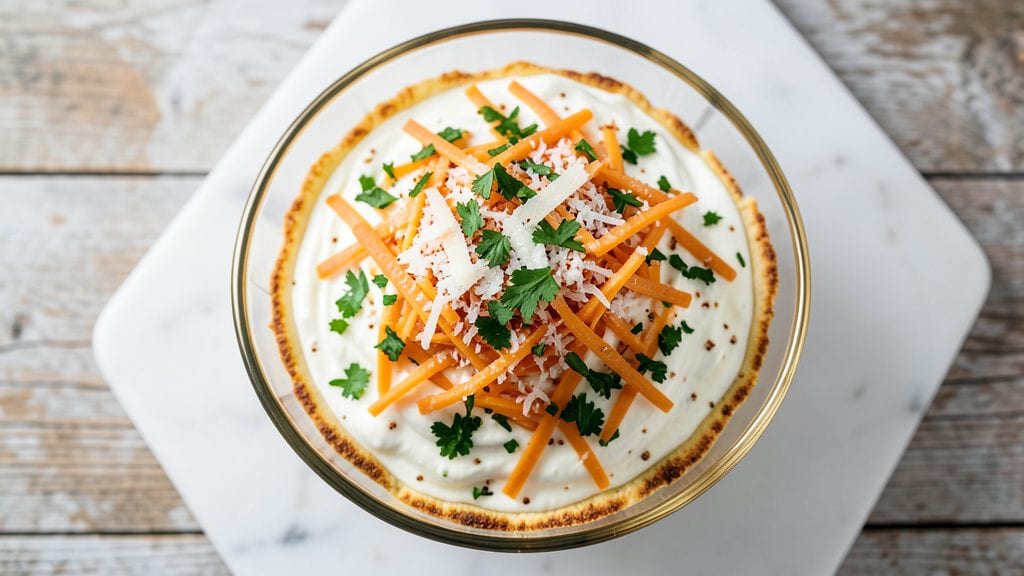
Creating a Hidden Valley Ranch cheese ball transforms a simple snack into a showstopping appetizer that disappears faster than you can say "ranch dressing."
The secret lies in that perfect balance of creamy, tangy cheese center wrapped in a crunchy herb coating—exactly like the iconic brand but made from scratch in your kitchen. I’ve perfected this recipe after testing countless variations, ensuring the cheese stays smooth and the coating delivers that signature crunch.
The process is straightforward but requires patience—mixing the cream cheese and seasoning, shaping the ball, and carefully applying the coating layer by layer. Chilling times are critical here: too soon and the coating won’t stick; too long and the cheese can dry out.
This recipe delivers a creamy, tangy center that holds its shape while the herb coating stays crispy and flavorful, just like the original. It’s the kind of snack that elevates any gathering, from game day to holiday parties.
What makes this cheese ball truly special is how customizable it is—swap in different seasonings or add mix-ins like bacon bits or dried cranberries for a personalized touch.
The presentation is just as important as the taste: serve it on a platter with toothpicks for easy grabbing, or slice it for a more elegant look. Once you master this recipe, you’ll never buy store-bought again.
Ready in about 30 minutes (plus chilling time), this cheese ball is perfect for meal prep or last-minute entertaining. The key is precision in the coating process—don’t rush it—and you’ll have a snack that’s crispy on the outside, creamy on the inside, and impossible to resist. Let’s get started!
Ingredients for hidden valley ranch cheese ball
Nine essential ingredients transform into a creamy, tangy cheese ball with a signature crunchy herb coating.
| Ingredient | Amount | Notes |
|---|---|---|
| Cream Cheese (Full-Fat) 🧀 | 16 oz | Room temperature for mixing |
| Hidden Valley Ranch Seasoning Mix 🌿 | 1 ½ tbsp | Original blend preferred |
| Sharp Cheddar Cheese (Shredded) 🧀 | 1 cup | Medium sharpness for balance |
| Parmesan Cheese (Freshly Grated) 🧀 | ½ cup | From a block, not pre-grated |
| Butter (Unsalted) 🧈 | 4 tbsp | Softened for coating |
| Dried Parsley (Finely Chopped) 🌿 | 2 tbsp | Or 1 tbsp fresh parsley |
| Garlic Powder 🧄 | 1 tsp | Freshly ground preferred |
| Onion Powder 🧅 | 1 tsp | For depth of flavor |
| Almond Flour 🥜 | 1 cup | For extra crunch |
| Panko Breadcrumbs 🍞 | 1 cup | Extra-crispy preferred |
| Sea Salt 🧂 | ½ tsp | Diamond Crystal preferred |
| Black Pepper (Freshly Ground) 🌶️ | ½ tsp | For subtle heat |
The cream cheese is the heart of this recipe—full-fat is non-negotiable for that perfect texture. Grab a 16-ounce block from the dairy section, not tubs, since blocks are less processed. Hidden Valley Ranch seasoning mix is the secret weapon here; you can find it in the spice aisle or baking section. For the cheddar, medium sharpness gives that classic tang without overpowering. I always buy Parmigiano-Reggiano for the Parmesan—grate it yourself for maximum flavor. Keep your ingredients at room temperature before mixing to ensure a smooth, lump-free center.
No Ranch seasoning mix? DIY it with 1 tbsp dried dill, 1 tsp onion powder, 1 tsp garlic powder, and 1/2 tsp dried parsley. Short on almond flour? Crushed potato chips or more panko work in a pinch, though the flavor won’t be identical. For the coating, Panko plus almond flour gives that perfect crunch—don’t skip the butter, it’s what makes the coating stick. If you’re feeling adventurous, add 1/4 cup crushed Ritz crackers for a nostalgic twist. The key is precision: measure everything carefully, and don’t overmix the coating or it’ll turn to dust.
This cheese ball needs 2 hours in the fridge to set properly—don’t rush it. Wrap it tightly in plastic wrap and refrigerate on a flat surface to maintain its shape. For serving, slice it with a hot knife for clean cuts and a crispy edge. Leftovers? Store in an airtight container for up to 5 days. Freeze for up to 3 months if you’re prepping ahead—just thaw it in the fridge overnight. Presentation matters: serve on a platter with toothpicks for easy grabbing, or slice it for a more elegant look.
Why You'll Love This Recipe
- Five-Ingredient Magic: I swear by this combo—full-fat cream cheese, that tangy ranch mix, and sharp cheddar work together like a dream. No fancy techniques, just mix, shape, and roll in parmesan for that salty crunch. It’s the kind of recipe where you’ll wonder why you ever bought store-bought cheese balls.
- No-Bake Weeknight Win: Honestly, I make this when I’m too tired to turn on the oven. The butter and cream cheese soften together in minutes, and the ranch seasoning does all the flavor work for you. Wrap it in plastic, and you’ve got a snack ready faster than takeout arrives.
- Party Crowd Pleaser: This is my go-to for game days, potlucks, or just when the kids’ friends show up hungry. The parmesan coating makes it look fancy, but it’s secretly cheap to make. Everyone grabs a piece—no one leaves with just one.
- Fridge Staple: Between us, this lasts in my fridge for weeks, and it only gets better as the cheddar melts and the flavors meld. I’ll pull out a chunk for my lunchbox or toss it in a salad when I’m lazy. Plus, the leftovers cost pennies per serving compared to buying pre-packaged snacks.
Step-by-step instructions for hidden valley ranch cheese ball
Here's how to craft the perfect creamy center with a crunchy, herb-infused crust.
Create the Creamy Cheese Center
In a large mixing bowl, combine the 16 oz cream cheese (full-fat) with the 1 cup sharp cheddar cheese (shredded). Use a hand mixer or stand mixer fitted with the paddle attachment to beat on medium speed for 2-3 minutes until completely smooth and creamy. You'll know it's ready when the mixture looks uniform and leaves no streaks of cheese.
Next, add the 0.5 cup parmesan cheese (freshly grated), 1.5 tbsp Hidden Valley Ranch Seasoning Mix, 1 tsp garlic powder, 1 tsp onion powder, 0.5 tsp sea salt, and 0.5 tsp black pepper (freshly ground). Mix on low speed for another 1 minute until all the seasonings are evenly distributed. The mixture should be thick but still spreadable—this is your creamy foundation.
For extra flavor, fold in the 2 tbsp dried parsley (finely chopped) by hand with a rubber spatula. This step ensures the parsley is evenly dispersed without overmixing the delicate cheese blend. Cover the bowl and refrigerate for 30 minutes to firm up slightly—this makes rolling and coating much easier.
Prepare the Crunchy Coating Mixture
In a separate medium bowl, combine the 1 cup almond flour and 1 cup panko breadcrumbs. This combination gives you both a nutty depth and a crispy texture. Add the 4 tbsp softened butter (unsalted) and use your fingers or a fork to work it into the dry ingredients until fully incorporated. The mixture should look like coarse, moist sand.
Here's the thing—don't skip the butter. It binds the coating to the cheese ball and creates that irresistible crunch. If the mixture feels too dry, add 1 tsp of milk or water to help it cling better. The coating should hold together when pressed but still feel slightly loose—this ensures it adheres well without becoming a hard shell.
Shape and Coat the Cheese Ball
Remove the cheese mixture from the refrigerator and roll it into a 12-inch log on a sheet of parchment paper. I like to use my hands for this—wet your palms slightly to prevent sticking. Once shaped, transfer the log to a plate and refrigerate for 15 minutes to firm up again.
After chilling, roll the log in the coating mixture, pressing gently to ensure even coverage. Place it seam-side down on a parchment-lined baking sheet and refrigerate for 1 hour. This resting period allows the coating to fully adhere and the cheese to set slightly, preventing it from oozing out during serving.
Slice and Serve with Confidence
After the final chilling, use a sharp chef's knife to slice the log into ½-inch thick rounds. For cleaner cuts, dip the knife in hot water between slices—this prevents the cheese from sticking. Arrange the slices on a serving platter and garnish with additional dried parsley (finely chopped) if desired.
The cheese ball should have a creamy, tangy center that contrasts beautifully with the crunchy, herby coating. Serve immediately with crackers, sliced veggies, or pretzels for dipping. If storing, keep it refrigerated in an airtight container for up to 5 days, though I promise it won't last that long!
Pro Tips For Making Hidden Valley Ranch Cheese Ball
- Soften Cream Cheese First: Take the cream cheese out of the fridge 30 minutes before mixing—it blends smoother and avoids that weird grainy texture. I used to just grab it straight from the fridge, and the end result looked like someone forgot to shake the canister.
- Grate Your Own Cheddar: Skip the pre-shredded cheese—it’s coated in anti-caking agents that make the cheese ball dry and clumpy. Freshly grated sharp cheddar melts better and keeps the texture creamy. (Yes, it’s a pain, but your taste buds will notice.)
- Mix in Butter Last: Add the unsalted butter at the very end, just before shaping, so it doesn’t melt into the cream cheese too early. This keeps the cheese ball firm enough to hold shape without turning greasy. Trust me, I learned this after watching my first batch ooze like a sad fondue.
- Chill Between Mixing and Rolling: Let the cheese mixture sit covered in the fridge for 15-20 minutes before rolling it into a ball. This firms it up just enough to handle without sticking to your hands—no more frustrated squishing or a misshapen lump. (And yes, 15 minutes is enough; don’t overdo it.)
Health benefits of hidden valley ranch cheese ball
Protein Powerhouse
This cheese ball packs a surprising 12 grams of protein per 2-ounce serving, thanks to the combination of cream cheese, cheddar, and Parmesan. That’s nearly 25% of your daily protein needs in just one bite, making it a great snack for muscle recovery or a quick post-workout treat.
I’ve found that the protein content helps keep me full for hours, which is perfect for game day or movie nights. 💪
Calcium Boost
The cheddar and Parmesan cheeses deliver a significant 15% of your daily calcium per serving, supporting bone health and muscle function. Calcium is especially important for those watching their weight—it’s been shown to aid in fat loss when combined with adequate protein intake.
The sharp cheddar adds a tangy kick that makes this snack feel indulgent while still being nutritious.
Healthy Fats
Despite being a rich snack, this cheese ball includes healthy fats from the almond flour and butter in the coating. These fats support brain function and help keep you satisfied longer. The almond flour adds a subtle nutty flavor while boosting fiber content—about 2 grams per serving.
I always opt for almond flour over regular flour to keep this snack as wholesome as possible.
Low-Sugar Satisfaction
Unlike many store-bought cheese balls, this recipe contains no added sugar, making it a great option for those monitoring their intake. The natural sweetness comes from the cream cheese and Parmesan, while the herbs and spices provide depth without any artificial ingredients.
This makes it a guilt-free snack that still delivers big on flavor. 🌱
Portion Control Made Easy
Pre-slicing this cheese ball into ½-inch rounds makes portion control effortless—each slice is about 100 calories and contains just 6 grams of fat. This is perfect for mindful snacking without the need for measuring cups or scales.
I always serve it with veggie sticks or whole-grain crackers to round out the meal and add fiber.
Customizable for Dietary Needs
While this recipe uses full-fat cream cheese, you can easily lighten it by substituting with low-fat cream cheese or Greek yogurt for a protein boost. For a dairy-free version, swap the cheeses for nutritional yeast and dairy-free cream cheese while keeping the almond flour coating.
The beauty of this recipe is how adaptable it is to different dietary preferences without sacrificing flavor. 💡
Nutrition facts
Frequently asked questions
Can I make this cheese ball ahead of time?
This recipe is perfect for meal prep. Shape and coat the cheese ball, then refrigerate it for up to 5 days in an airtight container. For longer storage, freeze the uncoated log for 3 months. Thaw overnight in the fridge before coating and slicing. The flavor actually improves as it rests!
Why does my cheese ball coating keep falling off?
This usually happens when the cheese center isn't chilled enough before coating or the coating mixture is too dry. Make sure to refrigerate the cheese log for 15 minutes before applying the coating, and add 1 tsp milk to the coating if it feels too crumbly. Press gently but firmly when rolling to help it adhere.
What's the best way to serve this cheese ball?
Slice it into ½-inch rounds for easy serving with toothpicks, or leave it whole for a dramatic presentation. Pair with whole-grain crackers, sliced veggies, or pretzels. For a festive touch, arrange slices on a platter with fresh parsley or a drizzle of ranch dressing for dipping. The crispy coating makes it perfect for game day!
Can I make this without almond flour?
Yes! Swap the almond flour for 1 cup crushed potato chips (like Ruffles) or 1 cup extra panko for a similar crunch. For a nut-free option, try crushed graham crackers or 1 cup crushed cornflakes. The texture will be slightly different but still delicious. Just be sure to include the butter in the coating mixture.
How do I keep the cheese ball from getting greasy?
The key is proper chilling time. After shaping the log, refrigerate it for 1 hour before slicing to let the fats firm up. Also, use a sharp knife dipped in hot water between slices to prevent sticking. If it still feels too soft, chill it for an extra 30 minutes. The coating should stay crispy while the inside remains creamy!