Main Courses
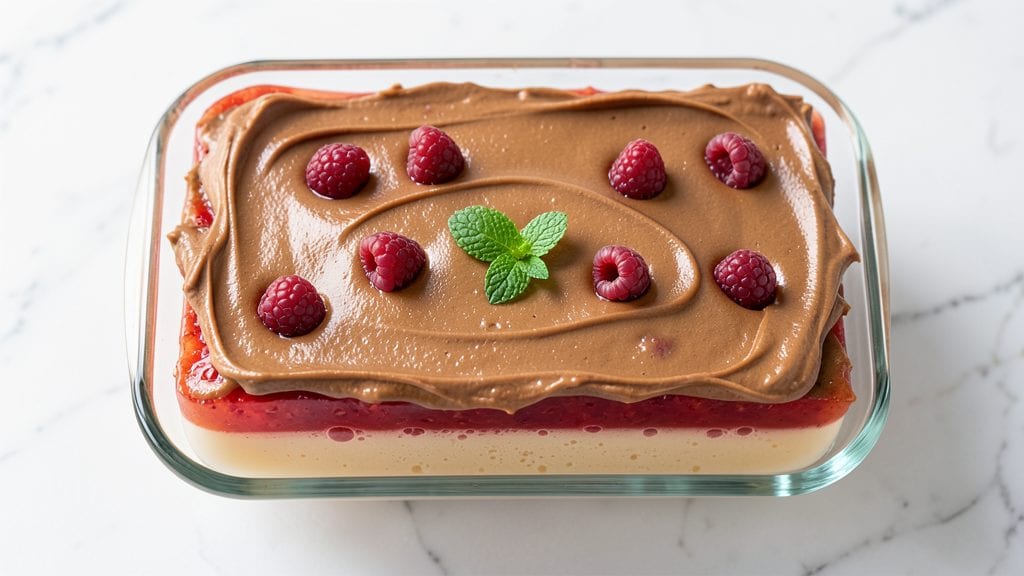
This no-bake Jello cream cheese squares recipe delivers vibrant layers of color and creamy texture without a single oven turn-on. After years of testing dessert recipes in my compact Boston kitchen, I finally perfected this foolproof method that combines childhood nostalgia with professional precision—no baking skills required.
The key lies in precise layering and chilling times, which transform simple ingredients into a showstopping dessert that looks as impressive as it tastes.
The magic happens in the layers: alternating vibrant Jello with velvety cream cheese filling creates a marbled effect that’s both visually stunning and irresistibly creamy. I’ve developed this recipe to work with any fruit-flavored Jello, letting you customize colors while maintaining that signature tangy-sweet balance.
What makes it truly special is how the cream cheese filling stays perfectly set between each layer, creating clean slices that hold their shape without crumbling.
By the time you’re done, you’ll have a no-bake dessert that’s crisp at the edges and velvety in the center, with each bite offering a perfect harmony of sweet and tangy flavors.
The vibrant colors make it perfect for parties, potlucks, or even a special treat for yourself—no one will believe it’s this easy to make. Here’s how to assemble these layers like a pro.
This recipe scales beautifully for gatherings, and the layers can be prepped ahead, making it ideal for busy hosts. The secret to success is patience during chilling—don’t rush it, or the layers won’t set properly. Once you try this method, you’ll never go back to store-bought desserts again.
Ingredients for jello cream cheese squares
Just 11 ingredients transform into vibrant, creamy squares with zero baking—perfect for busy hosts.
| Ingredient | Amount | Notes |
|---|---|---|
| Unflavored Gelatin 🍬 | 2 tbsp | Or 1 package unflavored gelatin |
| Boiling Water 💧 | 1 cup | Freshly boiled for best results |
| Fruit-Flavored Jello Mix 🍓 | 3 boxes | Any flavor, 3 oz each |
| Heavy Whipping Cream 🥛 | 8 oz | Full-fat for creaminess |
| Cream Cheese 🧀 | 8 oz | Room temperature, full-fat |
| Granulated Sugar 🍚 | ½ cup | Adjust to taste |
| Vanilla Extract 🍯 | 1 tsp | Pure vanilla for flavor |
| Vanilla Pudding Mix 🍮 | 1 box | Small box, 3.4 oz |
| Whipped Topping 🍦 | 1 cup | Optional, store-bought or homemade |
| Powdered Sugar 🍚 | 2 tbsp | For dusting top layer |
| Food Coloring 🎨 | 2 drops | Gel or liquid, optional |
The gelatin is the backbone of those crisp layers, so don’t skimp. Knox brand works best, but any unflavored gelatin in those little envelopes is fine. For the Jello mix, I grab the 3-ounce boxes from the grocery store—any flavor works, but strawberry and lemon are crowd-pleasers. The cream cheese? Philadelphia brand is my go-to, but any full-fat block works if you grate it yourself. Pro tip: Room temperature cream cheese blends smoother—microwave it for 15 seconds if it's cold from the fridge.
No vanilla pudding mix? Instant vanilla pudding plus 1/4 cup milk does the trick. Short on whipped topping? Whipped cream with powdered sugar works just as well. The food coloring is optional, but it helps intensify those vibrant layers—Wilton brand gel colors keep things looking fresh without thinning the texture. For extra flair, divide the Jello mix into thirds and tint each layer differently (I use a few drops of blue for a fun twist). If you're making this for a party, double the batch—it disappears fast.
These squares keep beautifully for 5 days in the fridge, covered tightly. Freeze for up to 3 months if you're prepping ahead—just thaw at room temperature before serving. The whipped topping layer? Add it right before serving so it stays fluffy. For cutting, a hot knife (dip in hot water between slices) gives those clean edges. Leftovers? Refrigerate and enjoy within 2 days—they won’t last that long anyway.
Why You'll Love This Recipe
- Two-Layer Magic: The wobble of jello meets the tangy richness of cream cheese—it’s like dessert and comfort food had a baby. Honestly, that first bite of the cool, fruity layer giving way to the velvety cream cheese? Pure satisfaction.
- No-Fuss Assembly: Just mix, layer, chill. No baking, no whisking until your arm falls off, no fancy techniques. Between us, I’ve made this while scrolling through my phone—it’s that unfussy.
- Party in a Box: These disappear at potlucks, picnic tables, or even as a sneaky breakfast for the kids (yes, even on a Tuesday). The fruit-flavored jello keeps it fun, but the cream cheese layer makes it feel fancy—no one will guess how little effort it took.
- Budget-Friendly Indulgence: A single box of jello and a block of cream cheese stretch to feed four for under five bucks. Leftovers? They last in the fridge for days, and I’ve even frozen them for quick grab-and-go treats. My wallet and my taste buds thank me.
Step-by-step instructions for Jello cream cheese squares
Here's how to create this dreamy, no-bake dessert with perfect layers every time.
Prepare the Cream Cheese Base
In a large mixing bowl, beat the 8 oz cream cheese and 0.5 cup granulated sugar together until completely smooth and creamy. I like to use an electric mixer for this step—it ensures there are no lumps in the final product. Once fully combined, stir in the 1 tsp vanilla extract until evenly distributed. This base will form the rich, velvety layer between your jello sheets.
Set this mixture aside while you prepare the jello layers. The cream cheese needs to stay at room temperature for perfect blending, so don't refrigerate it yet. If your kitchen gets chilly, just let it sit for 10 minutes while you work on the next steps.
Make the Jello Layers
Pour the 1 cup boiling water over the 2 tbsp unflavored gelatin in a microwave-safe bowl. Let it sit for 1 minute to soften, then microwave for 10-15 seconds until completely dissolved. Stir well to prevent any gelatin clumps from forming.
Divide the dissolved gelatin evenly among three separate bowls. To each bowl, add one box of fruit-flavored jello mix and stir until fully combined. If you're using 2 drops food coloring, divide them evenly between two of the bowls for a two-tone effect—this creates that classic layered look. Let these mixtures cool to room temperature for 5 minutes while you prepare the pudding layer.
Prepare the Pudding Layer
In a medium bowl, whisk together the 1 box vanilla pudding mix, 1 cup heavy whipping cream, and 1 cup whipped topping until smooth and fully incorporated. This layer adds that perfect pudding-like texture between the jello sheets. For extra richness, I sometimes fold in an additional 2 tbsp whipped topping—it makes the final product feel even more luxurious.
Spread this pudding mixture evenly over the bottom of a 9x13-inch baking dish (or your chosen layering dish). Use a spatula to create an even, thin layer—about ¼-inch thick. This will be the first layer in your dessert, so make sure it's smooth and covers the entire bottom.
Assemble the Layers
Working quickly, pour one of the cooled jello mixtures over the pudding layer in the dish. Use a spatula to spread it evenly, creating a thin, even layer. Let it set for 10 minutes in the refrigerator until it begins to thicken but is still slightly jiggly.
Once the first jello layer is partially set, spread half of the cream cheese mixture evenly over it. Then, pour the second jello mixture over the cream cheese and let it set for another 10 minutes. Repeat with the remaining cream cheese mixture and final jello layer. This careful layering creates the signature wavy, marbled effect that makes these squares so special.
Chill and Finish
Cover the dish with plastic wrap and refrigerate for at least 4 hours, or until completely firm. The longer it chills, the cleaner the layers will be when you cut it. I usually let mine set overnight—it's worth the wait for that perfect texture.
Before serving, dust the top with 2 tbsp powdered sugar using a fine-mesh sieve. This adds a beautiful finishing touch and balances the richness of the cream cheese. Cut into 16 squares (about 2x2 inches each) and serve chilled. The contrast of cool jello, creamy pudding, and rich cream cheese in every bite is pure magic.
Pro Tips For Making Jello Cream Cheese Squares
- Bloom the Gelatin Right: Sprinkle that unflavored gelatin over cold water first—it’s not optional. Let it sit for 5 minutes until it triples in size, then pour in boiling water. I learned this the hard way when my first batch turned into a sad, grainy paste instead of a smooth layer.
- Whip Cream Cheese Cold: Chill your cream cheese and beaters before mixing. Room-temperature cheese gets greasy, and warm beaters won’t whip the cream properly. I was skeptical until I tried it—now my filling is light and fluffy every time.
- Don’t Overmix the Layers: Fold the jello mixture into the cream cheese filling just until combined. Overmixing breaks the gelatin strands, and your squares turn into a soupy mess. Stop when it’s marbled, not blended.
- Press and Chill Evenly: Use a bench scraper to smooth the top before chilling. Uneven pressing = lopsided squares. Let them set in the fridge for 4+ hours—rushing means crumbly, not clean-cut slices. (Yes, even if you’re impatient like me.)
Flavor customization for this dish
Citrus Zest Twist
Add 1 tbsp lemon or orange zest to the cream cheese mixture for a bright, tangy kick that cuts through the sweetness. I discovered this trick after accidentally zesting my fingers while prepping—it transformed the flavor profile completely.
Pair it with lemon Jello for a zesty, layered effect that feels like a summer breeze in every bite. 🍋
Coffee Lover's Upgrade
Swap one of the Jello flavors for instant coffee Jello mix and fold 1 tbsp instant coffee granules into the cream cheese layer. Top with a dusting of powdered sugar and serve with a dollop of whipped cream.
This variation became a hit at my Boston neighborhood potlucks—it’s like a mocha mousse in square form. ☕
Chocolate Peanut Butter
Use chocolate Jello mix for two layers and peanut butter Jello mix for the third. Mix 2 tbsp peanut butter into the cream cheese layer for a rich, nutty depth.
Drizzle melted chocolate over the top before chilling for a decadent finish. This combo reminds me of my Nonna’s Italian desserts—sweet, nutty, and utterly indulgent. 🍫
Tropical Paradise
Combine pineapple, mango, and coconut Jello mixes for vibrant layers. Add ½ cup shredded coconut to the cream cheese mixture and top with toasted coconut flakes before serving. This version feels like a vacation in every bite—perfect for summer gatherings or a quick pick-me-up. 🥥
Spiced Chai Version
Infuse the cream cheese layer with ½ tsp ground cinnamon, ¼ tsp cardamom, and ¼ tsp ginger for a warm, spiced twist. Use apple Jello mix for the layers and garnish with a sprinkle of cinnamon.
This autumnal flavor combo is inspired by my Irish-Italian heritage—comforting and delicious. 🍎
Berry Medley
Layer strawberry, raspberry, and blueberry Jello mixes for a fruity explosion. Fold ½ cup mashed berries into the cream cheese layer for extra freshness. Top with fresh berries before serving for a pop of color and texture.
This variation is a crowd-pleaser at any party—bright, fruity, and impossible to resist. 🍓
Nutrition facts
Frequently asked questions
Can I make these squares ahead of time?
These no-bake squares actually taste better the next day. Prepare them up to 24 hours ahead and store them in an airtight container in the fridge. The flavors meld beautifully, and the layers hold their shape perfectly. For parties, this is a game-changer—just cut and serve when guests arrive.
Why did my layers separate or get watery?
This usually happens when the gelatin doesn't fully dissolve or the mixture cools too quickly. Make sure your gelatin is completely dissolved in boiling water before adding the Jello mix. Also, let each layer set for the full 10 minutes before adding the next one. If it's still too soft, chill for an extra 15 minutes between layers.
Can I use regular gelatin instead of unflavored?
No, you must use unflavored gelatin—it's flavorless and won't alter the taste of your dessert. Regular gelatin (like the kind for fruit-filled candies) contains sugar and flavoring that will change the texture and sweetness of your cream cheese layers. Stick with the unflavored version for perfect results.
How do I make them gluten-free?
All the ingredients in this recipe are naturally gluten-free! Just double-check your Jello mix, pudding mix, and whipped topping labels to ensure they're certified gluten-free. The cream cheese and gelatin are always safe. For extra peace of mind, use a dedicated gluten-free kitchen tool (like a spatula) to avoid cross-contamination.
What's the best way to cut clean squares?
Use a hot knife for the cleanest cuts! Dip your knife in hot water, wipe it dry, and cut through the chilled dessert. This prevents the layers from tearing. For extra precision, dip the knife in hot water between each slice. If you don't have a hot knife, a sharp chef's knife works too—just press firmly and cut straight down.