
Main Courses
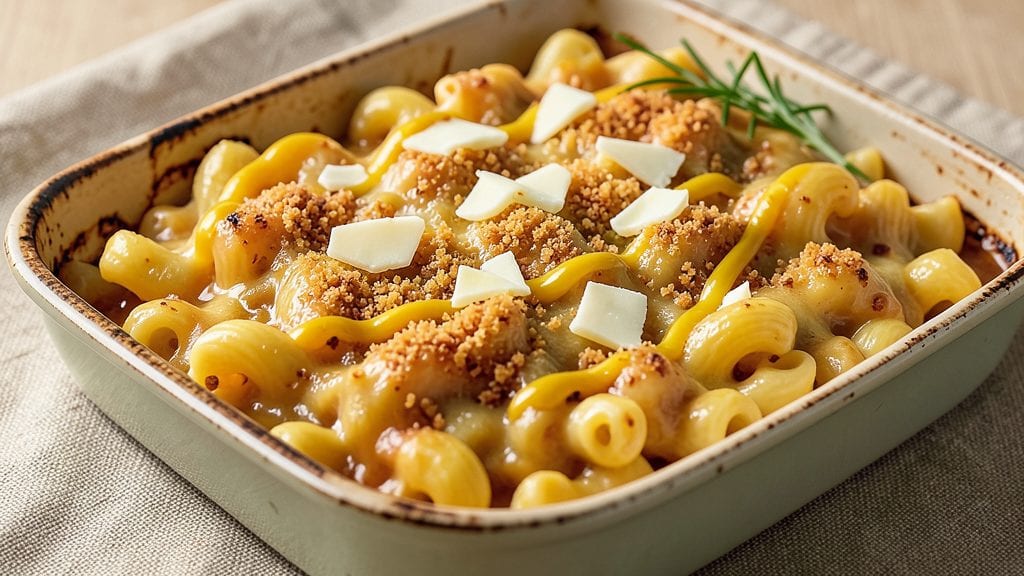
Old-fashioned baked mac and cheese delivers that nostalgic comfort food experience with a crispy breadcrumb topping and perfectly melty cheese—just like Grandma used to make. The secret lies in a slow-cooked cheese sauce that develops deep, caramelized flavors while maintaining that signature creamy texture. I've perfected this method over years of testing, ensuring every bite has that classic, rich satisfaction without requiring hours in the oven.
This recipe starts with elbow macaroni cooked just shy of al dente, then tossed in a velvety cheese sauce made from sharp cheddar, cream cheese, and a touch of mustard for that signature tang. The sauce simmers low and slow, developing layers of flavor while maintaining a silky consistency.
What sets this apart is the crispy breadcrumb topping, which adds texture contrast and prevents the cheese from drying out during baking.
By the time it emerges from the oven, you'll have golden, bubbling mac and cheese with a perfectly crispy topping that gives way to tender, melty cheese underneath.
The aroma alone will have everyone gathering at the table—this is comfort food at its finest, with all the rich, creamy goodness you remember from childhood. The best part? It comes together in under an hour, making it perfect for weeknight dinners or special occasions.
Serve with a simple green salad or steamed vegetables to balance the richness, or enjoy it as-is with a warm dinner roll. This old-fashioned version proves that classic recipes can still shine in today's busy kitchens. Let's get cooking!
Ingredients for old fashioned baked mac and cheese
Six ingredients transform into that nostalgic, bubbling mac and cheese with a crispy golden top.
| Ingredient | Amount | Notes |
|---|---|---|
| Elbow Macaroni 🍝 | 1 ½ lbs | Cooked just shy of al dente |
| Sharp White Cheddar Cheese 🧀 | 2 cups | Shredded, block preferred |
| Cream Cheese 🧈 | 8 oz | Full-fat for best creaminess |
| Heavy Whipping Cream 🥛 | 1 cup | Full-fat preferred |
| Dijon Mustard 🍯 | 1 tbsp | For signature tang |
| Butter 🧈 | 4 tbsp | Unsalted, melted |
| Milk 🥛 | ½ cup | Whole milk preferred |
| Salt 🧂 | 1 tsp | Kosher or sea salt |
| Black Pepper 🌶️ | ½ tsp | Freshly ground preferred |
| Garlic Powder 🧄 | ½ tsp | For subtle depth |
| Panko Breadcrumbs 🍞 | 1 cup | For crispy topping |
| Extra-Sharp Cheddar Cheese 🧀 | ½ cup | Shredded, for topping |
| Butter 🧈 | 2 tbsp | Melted, for breadcrumbs |
| Parsley 🌿 | 2 tbsp | Chopped, for garnish |
The cheese makes all the difference here—sharp white cheddar is non-negotiable for that classic tang. Kraft Singles won't cut it; grab a block from the deli counter. I always buy extra since it keeps for months. The cream cheese needs to be full-fat (none of that low-fat nonsense)—it's what gives that signature velvety texture. For the macaroni, elbow shape is traditional, but any short pasta works. Just make sure it's cooked al dente—it'll finish in the oven. The Dijon mustard is key for that signature tang, so don't skip it. I grab mine from Trader Joe's—it's always reliable.
No sharp cheddar? Extra-sharp cheddar at half the amount works in a pinch, but it'll be less tangy. Running low on cream cheese? Substitute sour cream at the same quantity, though the texture will be slightly different. The breadcrumbs are where the magic happens—panko gives the best crisp, but regular breadcrumbs toasted in the oven work too. Want extra flavor? Mix in 1 tsp smoked paprika with the breadcrumbs. The parsley is just for garnish, but fresh is worth it if you've got it—dried won't hurt anything, though. The butter for the breadcrumbs? Use salted if you're out of unsalted—just skip adding extra salt to the topping mix.
This keeps beautifully in the fridge for 4-5 days, though it reheats best from the freezer. Portion it into individual servings before freezing—3 months max. The topping stays crispy if you reheat it covered for 5 minutes, then uncovered for another 2-3. Leftovers? Microwave for 1 minute, then broil for 2 minutes to revive the crisp. Trust me, it's worth the extra minute.
Why You'll Love This Recipe
- No-Fuss Stovetop Start: I swear by the 10-minute stovetop melt—just toss cooked macaroni with shredded sharp cheddar, cream cheese, and heavy cream until it’s silky smooth. The Dijon mustard sneaks in that little tangy punch without extra effort.
- Tangy-Creamy Magic: That sharp cheddar and cream cheese combo? Chef’s kiss. The mustard cuts through the richness, and the heavy cream makes it velvety—like a hug in a baking dish. (Yes, even on a Tuesday night.)
- Lunchbox Hero: Pack it cold for school lunches or reheat it for dinner—this holds up perfectly. My kids grab the leftovers before I do, and honestly? I don’t blame them.
- Budget-Buster Crowdpleaser: A pound of elbow mac and a block of cheddar stretch to feed four (or five, if you’re like me). It’s my go-to for potlucks, game days, or when I’m broke but need to feed people. No one ever leaves hungry.
Step-by-step instructions for old fashioned baked mac and cheese
Here's how to make the ultimate comfort food—creamy, melty cheese with a golden, crispy top that holds together perfectly.
👨🍳 Step 1: Cook the Elbow Macaroni Just Right
Bring a large pot of water to a rolling boil and add the 1.5 lbs elbow macaroni. Cook until 1 minute shy of the package directions for al dente—this prevents mushiness when baked. I like to taste-test the pasta in the boiling water to check for doneness. Drain immediately and return it to the pot.
While still hot, toss the drained pasta with 4 tbsp melted butter and 1 tbsp Dijon mustard. This step ensures every strand gets coated with flavor and prevents a dry texture. The mustard adds a subtle tang that balances the richness of the cheese. Let the pasta cool slightly while you prepare the cheese sauce.
🍳 Step 2: Make the Creamy Cheese Sauce
In a large bowl, combine the 2 cups sharp white cheddar cheese and 8 oz cream cheese. Microwave in 30-second intervals, stirring between each, until the mixture is completely melted and smooth. I like to use a rubber spatula to scrape the bottom and sides—this prevents any unmelted cheese from creating lumps later.
Add the 1 cup heavy whipping cream, 0.5 cup milk, 1 tsp salt, 0.5 tsp black pepper, and 0.5 tsp garlic powder to the melted cheese. Stir until fully incorporated, then pour the mixture over the cooked pasta. Toss gently but thoroughly to coat every strand evenly. The sauce should be thick but still pourable—if it's too thick, add a splash more milk to reach the right consistency.
🥘 Step 3: Assemble and Bake for the Perfect Texture
Transfer the macaroni and cheese mixture to a 9x13-inch baking dish, spreading it evenly into a single layer. The dish should be about ¾ full—this allows room for the top to crisp without overflowing. Sprinkle the 0.5 cup extra-sharp cheddar cheese evenly over the top, pressing it gently into the surface so it melts into the dish rather than staying as a separate layer.
Cover the baking dish tightly with aluminum foil and bake at 350°F for 25 minutes. This initial baking step ensures the cheese melts completely and the macaroni absorbs all the creamy goodness. After 25 minutes, remove the foil and return it to the oven for another 5 minutes—this helps set the top for the crispy breadcrumb layer.
🔥 Step 4: Add the Crispy Topping
In a small bowl, mix the 1 cup panko breadcrumbs with the 2 tbsp melted butter until fully combined. Spread this mixture evenly over the top of the macaroni and cheese, pressing down lightly with the back of a spoon. This ensures the breadcrumbs stick and create a solid, golden crust. Return the dish to the oven and bake for an additional 10-12 minutes until the topping is deep golden brown and crispy.
Here's the thing—don't overbake. The topping should be golden and crispy, but the cheese underneath should still be warm and gooey. If the edges start to brown too quickly, tent the dish loosely with foil for the last few minutes to prevent burning. Let the mac and cheese rest for 10 minutes before serving—this allows the cheese to set slightly and makes slicing easier.
🍽️ Step 5: Garnish and Serve
Sprinkle the 2 tbsp chopped parsley evenly over the top just before serving. The parsley adds a pop of color and freshness that cuts through the richness of the cheese. Serve immediately while the topping is still crispy and the cheese is melty. This dish is best enjoyed fresh out of the oven—every bite should deliver that perfect combination of creamy, cheesy goodness with a satisfying crunch on top.
Real talk: if you wait too long, the crispy topping will soften. That's why I always serve it straight from the oven with a side of crusty bread to soak up every last bit of that creamy sauce.
Pro Tips For Making Old Fashioned Baked Mac And Cheese
- Cook pasta al dente: DESCRIPTION: I learned this the hard way—undercooked pasta turns mushy when it bakes, while overcooked pasta gets gummy. Boil elbows 1 minute less than package instructions, then drain and rinse briefly in cold water to stop cooking. The slight bite holds up better when baked, and the texture stays perfect.
- Shred cheese aggressively: DESCRIPTION: Pre-shredded cheese has anti-caking agents that make baked mac and cheese grainy. Use a box grater or food processor for sharp white cheddar—aim for small, uneven shreds (they melt faster and create pockets of gooey goodness). Skip the pre-shredded stuff unless you’re okay with a sad, dry top layer.
- Temper the cream: DESCRIPTION: Dumping cold heavy cream into a hot cheese sauce causes separation. Warm the cream first—microwave for 20 seconds or heat in a saucepan until steaming, then whisk it into the sauce slowly. This keeps the sauce silky instead of breaking into lumps.
- Bake uncovered, then broil: DESCRIPTION: Covering the dish with foil steams the top to sogginess. Bake uncovered at 350°F until bubbly, then switch to broil for 2–3 minutes to get a golden crust. Watch it like a hawk—it burns faster than you think, but that crispy edge is worth the effort.
Best sauces and condiments for this old fashioned baked mac and cheese
Classic Cheese Sauce
This rich, velvety cheese sauce is the heart of your mac and cheese. The combination of sharp white cheddar and cream cheese creates the perfect balance of tangy and creamy flavors.
For extra depth, I always add a splash of heavy whipping cream and a touch of Dijon mustard—this gives that signature tang that makes it truly old-fashioned. 🧈
Buttery Breadcrumbs
The crispy breadcrumb topping is what transforms ordinary mac and cheese into a showstopper. I mix 1 cup panko breadcrumbs with 2 tbsp melted butter for that perfect golden-brown crust.
For extra flavor, toss in ½ tsp smoked paprika or garlic powder before spreading it over the top. This step is non-negotiable for that satisfying crunch! 🍞
Spicy Kick
Want to add some heat? A sprinkle of crushed red pepper flakes or a dash of Cayenne pepper over the cheese sauce before baking adds a subtle kick.
I like to start with ¼ tsp and adjust to taste—this is especially good if you're serving it with mild sides like steamed broccoli. 🌶️
Herb Infusion
Fresh herbs elevate the dish without overpowering the cheese. I always finish with 2 tbsp chopped parsley, but you could also try green onions or chives**> for a different flavor profile.
If you're feeling fancy, a sprinkle of fresh thyme adds an earthy note that pairs beautifully with the cheddar. 🌿
Creamy Drizzle
For an extra-luxurious touch, drizzle the baked mac and cheese with a thin layer of heavy cream or bechamel sauce before serving. This adds a silky finish that ties everything together. I also love a drizzle of hot honey for a sweet-spicy contrast that balances the richness. 🍯
Smoky Twist
For a smoky depth, stir ½ tsp smoked salt or 1 tbsp smoked gouda cheese into the cheese sauce. Alternatively, add a pinch of liquid smoke (just ¼ tsp) for a subtle smokiness that reminds me of campfire cooking. This works especially well with a crispy breadcrumb topping. 🔥
Nutrition facts
Frequently asked questions
Why does my baked mac and cheese get watery after baking?
The most common cause is overcooking the pasta or using too much liquid in the sauce. Always cook pasta just 1 minute shy of al dente and let it cool slightly before mixing with the cheese sauce. If your sauce is too thin, simmer it uncovered for 3-5 minutes to thicken naturally. Too much milk or cream can also dilute the cheese—start with the recipe measurements and adjust gradually.
Can I make this ahead of time for a dinner party?
Assemble the dish completely (including the breadcrumb topping) and refrigerate it overnight. When ready to serve, bake it covered at 350°F for 30-35 minutes, then add the breadcrumbs and bake uncovered for 10-12 minutes to crisp the top. For extra insurance, tent with foil for the last 5 minutes to prevent over-browning. The flavors develop even better after resting!
What's the best way to reheat leftovers without losing the crispy topping?
Reheat leftovers covered in the microwave for 1 minute, then transfer to a baking dish and broil on high for 2-3 minutes until the top is golden again. For oven reheating, cover with foil and bake at 375°F for 15 minutes, then uncover and broil for 2 minutes to restore crispiness. The key is high heat for a short time—never microwave uncovered!
Can I substitute regular breadcrumbs for panko?
Yes, but you'll need to toast them first for better texture. Spread 1 cup regular breadcrumbs on a baking sheet and bake at 350°F for 5-7 minutes until golden. Mix with 2 tbsp melted butter as usual. Panko gives a lighter, crispier texture, but toasted regular breadcrumbs work in a pinch. For extra flavor, add ½ tsp garlic powder or onion powder to the dry breadcrumbs before toasting.
How do I prevent the cheese from separating or becoming grainy?
Separation happens when cheese melts too quickly or when dairy liquids (milk/cream) are too hot. Always melt cheese gently over low heat or in 30-second microwave intervals, stirring constantly. For extra insurance, whisk in a splash of lemon juice (just ½ tsp) or white vinegar—the acidity helps emulsify the cheese. Never add hot liquid to cold cheese, and always stir vigorously when combining.