
Main Courses
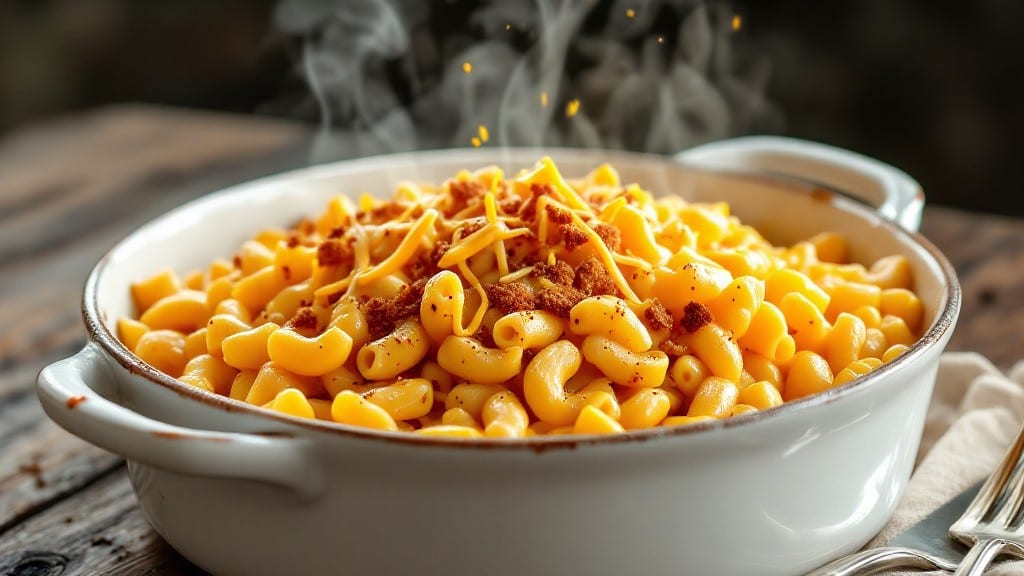
The original Kraft macaroni and cheese recipe delivers that nostalgic, creamy comfort in every bite—just like the box promised, but better. I’ve refined this classic to achieve a velvety cheese sauce with a golden, crispy breadcrumb topping that’s impossible to resist.
The secret lies in the roux and proper cheese melting technique, which transforms simple pantry staples into something restaurant-worthy.
This recipe stays true to the original while adding modern touches like a crispy topping that adds texture contrast. With just 15 minutes of active prep and 20 minutes of baking, you’ll have a cheesy masterpiece ready for the table.
The key is patience—letting the cheese melt slowly ensures a smooth, lump-free sauce that coats every noodle perfectly.
What you’ll end up with is a dish that’s creamy, rich, and satisfying—with that irresistible crispy layer on top. The aroma alone will have everyone gathering around the table, and the first bite delivers on all the comfort food promises.
It’s the kind of meal that feels indulgent yet simple enough for a busy weeknight.
Serve it as-is for a classic version or add-ins like bacon, broccoli, or hot sauce for extra flavor. The beauty of this recipe is its flexibility—it’s always a crowd-pleaser, no matter how you customize it. Let’s get cooking!
Ingredients for original kraft macaroni and cheese
Pantry staples meet nostalgic comfort—simple ingredients for the ultimate cheesy classic.
| Ingredient | Amount | Notes |
|---|---|---|
| Elbow Macaroni 🍝 | 8 oz | Uncooked, standard shape |
| Unsalted Butter 🧈 | ½ cup | Cold, cut into cubes |
| All-Purpose Flour 🌾 | ½ cup | For roux base |
| Milk 🥛 | 2 cups | Whole milk preferred |
| Yellow Cheddar Cheese 🧀 | 2 cups | Shredded, block preferred |
| Sharp Cheddar Cheese 🧀 | 1 cup | Shredded, for depth |
| Parmesan Cheese 🧀 | ¼ cup | Freshly grated |
| Kosher Salt 🧂 | 1 ½ tsp | Adjust to taste |
| Ground Black Pepper 🌶️ | ½ tsp | Freshly ground |
| Garlic Powder 🧄 | ½ tsp | For subtle flavor |
| Dried Mustard 🌶️ | ¼ tsp | For tangy depth |
| Panko Breadcrumbs 🍞 | ½ cup | For crispy topping |
| Extra-Virgin Olive Oil 🫒 | 2 tbsp | For topping drizzle |
| Butter 🧈 | 2 tbsp | Melted, for topping |
The cheeses are where magic happens. Yellow cheddar delivers that classic Kraft tang, but sharp cheddar adds complexity—don't skip it. For the best results, shred your own cheese from a block (pre-shredded has anti-caking agents that make the sauce grainy). Kraft Natural or Cabot are my go-tos for that authentic flavor. The Parmesan? Freshly grated adds umami depth that powdered can't match. If you're in a pinch, Parmigiano-Reggiano from the deli section works wonders.
No sharp cheddar? Extra sharp white cheddar or even Monterey Jack at half the amount will get you close. The dried mustard can be swapped for Dijon mustard at half the amount—just don't use yellow mustard, it's too harsh. For the roux, butter and flour are non-negotiable—this is what creates that velvety texture. If you're watching fat, you can use half butter, half olive oil, but the flavor won't be quite the same. The breadcrumbs? Panko stays crispy—regular breadcrumbs get soggy.
This sauce reheats beautifully—just add a splash of milk to loosen it up. The crispy topping? Make it fresh—don't bake it too long or it'll turn into cereal. Store leftovers covered in the fridge for 3-4 days. The sauce freezes well for up to 3 months, but the topping is best made fresh. Pro tip: Assemble the dish, then chill it for 20 minutes before baking—this helps the topping get extra crispy.
Why You'll Love This Recipe
- No-Fuss Pantry Staples: I swear by this recipe because it uses things I already have—no fancy shopping trips. Butter, flour, milk, and cheddar? That’s it. The roux builds rich flavor without extra steps, and the elbow macaroni cooks in the same pot. Honestly, I’ve made this when my fridge was empty and my kids still begged for seconds.
- Velvet Cheddar Magic: That golden, stretchy cheese sauce? It’s all in the technique—melting the butter with flour first, then slowly adding milk until it’s silky. The sharp yellow cheddar cuts through the creaminess just right, and the crispy edges on the pasta? Chef’s kiss. Between us, this is the kind of mac and cheese that makes boxed versions look sad.
- Lunchbox Hero: I pack leftovers in mason jars for school lunches—cold or reheated, it’s always a hit. The sauce clings to the pasta perfectly, and the kids can eat it with a spoon if they’re in a hurry. (Yes, even on a Tuesday.) It’s also my go-to for potlucks—just transfer to a baking dish, broil for 3 minutes, and boom, crowd-pleaser.
- Budget Comfort: This recipe stretches a dollar without sacrificing taste. A single bag of pasta, a block of cheddar, and a stick of butter feed four for under $5. I’ll be real: I’ve made it for date nights, sick-day meals, and even a last-minute dinner when I forgot to grocery shop. It’s my secret weapon for when life gets real.
Step-by-step instructions for original Kraft macaroni and cheese recipe
Here's how to create that iconic velvety cheese sauce with a perfectly crispy breadcrumb topping.
Cook the Elbow Macaroni to Al Dente
Bring a large pot of water to a rolling boil and add 1.5 teaspoons kosher salt. Add the 8 ounces elbow macaroni and cook until 1 minute before the package instructions indicate for al dente. This slight undercooking prevents the pasta from becoming mushy when mixed with the cheese sauce. Drain the pasta in a colander, shaking well to remove excess water, and set aside.
Reserve ½ cup of the pasta water before draining. This starchy water is essential for creating a smooth, velvety cheese sauce later. The starch acts as a natural thickener and helps emulsify the cheese mixture. Keep the water nearby as you'll need it in the next step.
Prepare the Velvety Cheese Sauce
In a large, heavy-bottomed saucepan, melt the ½ cup unsalted butter over medium heat. Once melted, reduce the heat to medium-low and whisk in the ½ cup all-purpose flour to form a roux. Cook for 2-3 minutes, stirring constantly, until the mixture turns a light golden color and smells nutty.
Gradually whisk in the 2 cups milk over 2-3 minutes, ensuring each addition is fully incorporated before adding more. Bring the mixture to a gentle simmer, then reduce the heat to low and cook for 5 minutes, stirring frequently, until the sauce begins to thicken. This step builds the foundation for your creamy sauce.
Remove the saucepan from heat and begin adding the cheeses in stages. First, stir in the 2 cups yellow cheddar cheese and 1 cup sharp cheddar cheese until fully melted and smooth. Then, whisk in the ¼ cup freshly grated parmesan cheese. The sauce should be thick and velvety, coating the back of a spoon. If it's too thick, whisk in 2-3 tablespoons of the reserved pasta water until you reach a pourable consistency.
Combine Pasta and Sauce
Add the drained elbow macaroni to the cheese sauce and stir gently until every strand is fully coated. The pasta will absorb the sauce quickly, so work efficiently. Taste and adjust seasoning with additional kosher salt, ground black pepper, garlic powder, and dried mustard as needed. The sauce should be rich, slightly tangy, and well-balanced in flavor.
Transfer the macaroni and cheese to a 9x13-inch baking dish and spread it evenly into a single layer. This even distribution ensures the breadcrumb topping crisps uniformly. Preheat your oven to 375°F while you prepare the topping.
Create the Crispy Breadcrumb Topping
In a small bowl, combine the ½ cup panko breadcrumbs, 2 tablespoons extra-virgin olive oil, and 2 tablespoons melted butter. Mix thoroughly with a fork until the breadcrumbs are evenly coated and slightly clumped together. This mixture is what will create that signature crispy, golden-brown topping.
Sprinkle the breadcrumb mixture evenly over the macaroni and cheese, pressing down gently with the back of a spoon to help it adhere. The topping should cover the entire surface without gaps. Place the baking dish on the middle rack of your preheated oven and bake for 15-20 minutes, until the topping is deep golden brown and bubbly.
Rest and Serve
Remove the macaroni and cheese from the oven and let it rest for 5 minutes before serving. This resting period allows the sauce to slightly thicken and the topping to set, making it easier to cut and serve. The dish should be served immediately while the topping is still crispy and the cheese sauce remains velvety.
Use a spatula to scrape up any sauce that may have pooled at the bottom of the dish, redistributing it evenly. Serve in individual portions, ensuring each serving gets a generous helping of that crispy breadcrumb topping. The contrast between the creamy cheese sauce and the crunchy top is what makes this recipe truly special.
Pro Tips For Making Original Kraft Macaroni And Cheese
- Cook Pasta Al Dente: The Kraft recipe calls for fully cooked noodles, but I’ve found elbow macaroni holds up better if you undercook it by 30 seconds—it finishes in the cheese sauce and absorbs flavor like a sponge. (Yes, even if you’re impatient like me.)
- Melt Butter Slowly: Don’t rush the roux—melt the butter over medium heat until it’s just foaming, then whisk in the flour. If you crank it too high, you’ll get nutty, bitter flavors before the sauce even thickens. (After burning three batches, I finally figured this out.)
- Shred Cheese Fresh: Pre-shredded cheese has anti-caking agents that make the sauce grainy. Grate your own yellow cheddar on the large holes of a box grater right before mixing—it melts smoother and tastes fresher. (I know, I know, but trust the process.)
- Simmer, Don’t Boil: Once the cheese is added, reduce heat to low and stir constantly for 2–3 minutes. Boiling the sauce seizes the cheese and turns it gluey. A gentle simmer keeps it creamy and velvety. (Your future self will thank you.)
Serving suggestions for this recipe
Classic Comfort Presentation
Serve this mac and cheese in its baking dish straight from the oven for that restaurant-style presentation. The crispy breadcrumb topping stays perfectly intact when lifted with a spatula, and the golden edges make it look as good as it tastes.
For an extra touch, garnish with fresh parsley or crispy bacon bits before serving. I love how the warm, bubbly sauce contrasts with the cool, crispy topping right out of the oven. 🍽️
Family-Style Feast
This dish is perfect for family-style gatherings where everyone can serve themselves. Use a large, shallow serving bowl to keep the crispy topping intact while scooping. I recommend a stoneware serving bowl from Target's Goodfellow & Co. line—it keeps the dish warm and looks elegant on the table.
For a playful touch, serve with hot sauce and extra black pepper on the side so everyone can customize their bite.
Kid-Friendly Fun
Turn mealtime into a fun activity by letting kids assemble their own mini mac and cheese cups. Divide the baked mac and cheese into ramekins or small baking dishes (I use 6-ounce ceramic cups from IKEA) before baking.
Let them sprinkle their own toppings like crushed potato chips, mini marshmallows, or chopped chives before popping into the oven for 5-7 minutes to crisp the topping. It's a great way to get them excited about dinner!
Side Dish Pairings
For a complete meal, pair this mac and cheese with simple sides that complement its richness. A crisp green salad with a tangy vinaigrette cuts through the creaminess beautifully—I love a mix of arugula, cherry tomatoes, and cucumber with a lemon-olive oil dressing.
For something heartier, serve with roasted broccoli or garlic sautéed green beans. The contrast of textures and temperatures makes every bite more satisfying. 🥗
Make-Ahead Serving
This dish reheats beautifully, making it perfect for meal prep. Assemble the mac and cheese in the baking dish, cover with foil, and refrigerate for up to 2 days.
When ready to serve, bake at 375°F for 20-25 minutes, adding 5 minutes to the topping time to ensure it crisps again. For a shortcut, make the sauce ahead, cool it completely, then refrigerate in an airtight container for up to 3 days.
Reheat gently on the stovetop with a splash of milk, then mix with cooked pasta and bake as directed.
Dessert Twist
Yes, you read that right! For a decadent dessert, drizzle warm mac and cheese over vanilla ice cream or brownies for a cheesy, gooey treat. I like to use Salted Caramel Ice Cream from Trader Joe's—it balances the richness of the mac and cheese perfectly.
Top with toasted pecans or caramelized bananas for extra flair. This unexpected combo is a hit at dinner parties and always gets compliments. 🍦
Nutrition facts
Frequently asked questions
Can I make this mac and cheese without baking it?
For a stovetop version, simply mix the cooked pasta with the cheese sauce in a large skillet over low heat until fully combined. The sauce will thicken as it cooks. For extra richness, stir in 2 tablespoons butter at the end. Serve immediately with a sprinkle of Parmesan cheese or black pepper. This method works great for quick weeknight meals!
Why did my cheese sauce get grainy?
Grainy sauce usually means the cheese didn't melt smoothly. To fix this, whisk in a splash of reserved pasta water (about 1-2 tablespoons) to help emulsify the sauce. For prevention, always shred your own cheese from a block (pre-shredded contains anti-caking agents) and add cheeses gradually, starting with the sharpest varieties. Keep heat on low while melting to avoid scorching.
What's the best way to reheat leftovers?
For best results, cover leftovers with foil and reheat in the oven at 350°F for 15-20 minutes. To revive the crispy topping, sprinkle fresh breadcrumbs on top before reheating. If using the microwave, stir in 1 tablespoon milk to loosen the sauce, then heat in 30-second intervals, stirring between each. Avoid overcooking—just until warmed through!
Can I use a different type of pasta?
Elbow macaroni is ideal for this recipe because its shape holds the sauce well, but you can use penne, cavatappi, or shells instead. For best texture, choose a pasta with ridges or holes. Avoid long, thin noodles like spaghetti—they won't trap the cheese sauce as effectively. If using shells, reduce cooking time by 1 minute to prevent overcooking.
How can I make this recipe vegetarian?
This recipe is already vegetarian-friendly! Just ensure your butter is dairy-free if needed. For added depth, stir in ½ teaspoon nutritional yeast when adding the cheese for a cheesy flavor without animal products. You can also boost umami with 1 teaspoon white miso paste in the roux. The crispy breadcrumb topping remains the same—just use dairy-free butter in the mixture.