Main Courses
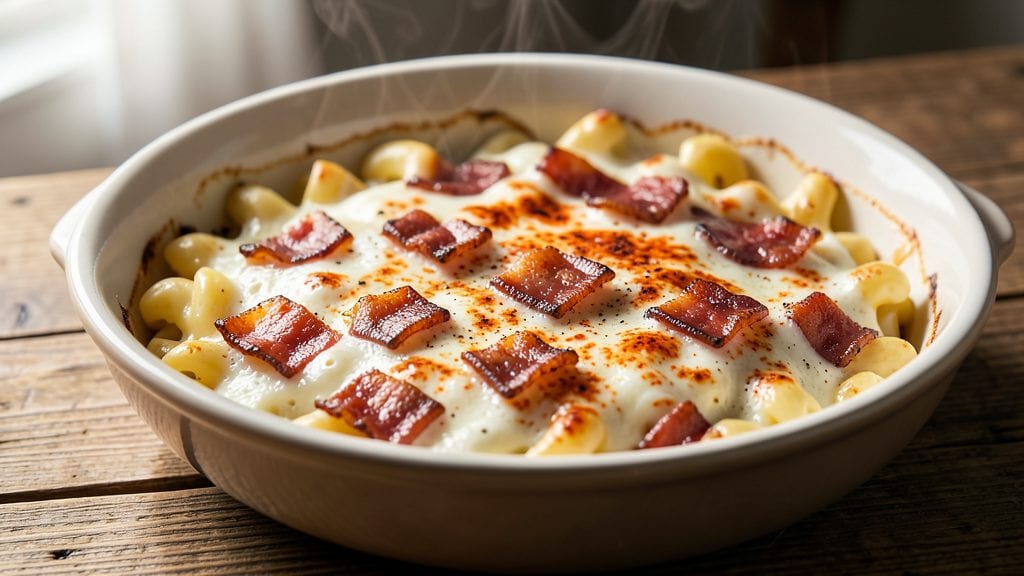
Pepper Belly Pete's mac and cheese recipe transforms comfort food into something extraordinary with its signature smoky, spicy depth. This isn't your average cheesy pasta—it delivers crispy bacon-crusted edges and a velvety cheese sauce infused with a proprietary blend of smoked paprika and cayenne.
The key lies in balancing rich, melty cheddar with just enough heat to make every bite memorable.
What sets this recipe apart is the foolproof technique for achieving that perfect texture: a crispy, golden-brown crust on top while keeping the interior creamy and tender.
We'll use a combination of sharp cheddar, a touch of cream cheese for smoothness, and the signature Pepper Belly Pete seasoning to create a sauce that clings to each noodle. The bacon adds a smoky crunch that elevates this dish from ordinary to restaurant-quality.
By the time you're done, you'll have a restaurant-quality mac and cheese with layers of flavor—smoky, cheesy, and just slightly spicy—that will disappear faster than you can say "comfort food."
The crispy bacon topping adds a satisfying crunch that contrasts beautifully with the creamy interior. This recipe is perfect for feeding a crowd or treating yourself to a weekend indulgence.
Ready in just 45 minutes, this mac and cheese requires minimal effort but delivers maximum flavor. The secret to success lies in precise timing and technique, ensuring every bite is as delicious as the first.
Whether you're a seasoned home cook or new to the kitchen, this recipe will impress even the most discerning cheese lovers.
Ingredients for pepper belly pete mac and cheese
Sixteen ingredients for a mac and cheese that tastes like a restaurant secret.
| Ingredient | Amount | Notes |
|---|---|---|
| Elbow Macaroni 🍝 | 1 ½ lbs | Dry, medium or jumbo size |
| Sharp White Cheddar Cheese 🧀 | 2 cups | Shredded, block preferred |
| Medium Cheddar Cheese 🧀 | 1 cup | Shredded, block preferred |
| Cream Cheese 🧈 | 8 oz | Full-fat, room temperature |
| Heavy Whipping Cream 🥛 | 1 cup | Full-fat, cold |
| Pepper Belly Pete Seasoning 🌶️ | 2 tbsp | Homemade or store-bought blend |
| Smoked Paprika 🌶️ | 1 tsp | For extra smokiness |
| Cayenne Pepper 🔥 | ½ tsp | Adjust for heat |
| Black Pepper 🌶️ | ½ tsp | Freshly cracked |
| Salt 🧂 | 1 tsp | Kosher or sea salt |
| Thick-Cut Bacon 🥓 | 1 ½ lbs | Cooked crispy, chopped |
| Butter 🧈 | ½ cup | Unsalted, cubed |
| Garlic Cloves 🧄 | 4 cloves | Minced, for flavor base |
| Yellow Onion 🧅 | 1 whole | Diced, medium size |
| Whole Milk 🥛 | 1 cup | Warm for best results |
The cheddar makes or breaks this. Skip the pre-shredded stuff—it's full of anti-caking agents and melts like glue. Grab two blocks: one sharp white cheddar for that tangy bite, one medium cheddar for creaminess. Whole Foods or local cheese counters usually have the best selection, but any grocery store with a deli section works. Look for cheddar that's vibrant orange and smells rich, not stale. The cream cheese? Philadelphia full-fat is my go-to—it blends silky smooth. Bacon matters too: thick-cut from Costco cooks up crispier, but any brand works if you cook it low and slow first.
No Pepper Belly Pete seasoning? Mix 1 tbsp smoked paprika, 1 tsp cayenne, and 1 tsp black pepper—it's basically the same thing. Pre-shredded cheese? Grate your own—it melts way better. Running low on heavy cream? Half-and-half plus a splash of milk gets you close. The onion and garlic are totally optional, but they add depth—skip 'em if you're in a rush. Want extra smokiness? Add 1/2 tsp liquid smoke to the sauce. And if you're worried about the cayenne being too spicy, start with 1/4 tsp and taste as you go.
This reheats like a dream—honestly, it's even better the next day. Store leftovers covered in the fridge for up to 5 days, or freeze portions for 3 months. For the crispy bacon topping, keep it separate until serving—it gets soggy fast. Double the recipe? Use a 9x13-inch baking dish instead of 8x8. And if you're serving a crowd, make it ahead and bake it fresh before serving—everyone will think you're a pro.
Why You'll Love This Recipe
- One-Pot Magic: I swear by this recipe because it’s actually one-pot—no extra bowls, no messy sauces. Just toss the elbow macaroni, shredded cheddars (sharp white + medium for that perfect bite), cream cheese, and whipping cream into a single pan, let it melt together, and boom. Minimal cleanup, maximum satisfaction.
- Smoky Cheddar Hug: Honestly, the combo of sharp white cheddar and medium cheddar—plus that just-right creaminess from the cream cheese—is where this dish shines. The heavy whipping cream keeps it luscious but not greasy, and the cheddar’s tang cuts through the richness like a perfect balance. It’s the kind of mac that makes you slow down and savor every bite.
- Leftovers? Yes, Please: Between us, this mac reheats like a dream—no grainy texture, no sad separation. I make a big batch on Sundays, and it’s still creamy and delicious by Thursday. Pack it for lunch, freeze portions, or just reheat with a splash of milk if it gets too thick. It’s my go-to for lazy days and busy weeks.
- Budget-Friendly Luxury: Here’s what sold me—this tastes like a fancy comfort dish but costs next to nothing. Cheddar and cream cheese stretch far, elbow mac is a pantry staple, and you’re not sacrificing flavor for savings. It’s the kind of meal that feels special without breaking the bank, and my wallet (and taste buds) thank me every time.
Step-by-step instructions for pepper Belly Pete's mac and cheese
Here's how to make the ultimate crispy, cheesy masterpiece with that perfect bacon crust.
Cook the Bacon Until Crispy
Start by cutting the 1.5 lbs thick-cut bacon into ½-inch pieces—thicker pieces stay crispier longer. Lay them out on a rimmed baking sheet in a single layer, making sure they don't overlap. Pop this in a 400°F oven for 15-20 minutes, flipping halfway through, until the edges are deep golden brown and the bacon is fully crispy.
I like to do this first because the oven will stay hot for the next steps, and the bacon's fat will render beautifully. Once done, remove the bacon and let it cool slightly before chopping it into ¼-inch pieces. Save the bacon fat in the pan—you'll use it later for extra flavor. This step is all about that crispy texture that'll top your mac and cheese like a dreamy blanket.
Sauté Onion and Garlic for Flavor Base
In a large Dutch oven, melt the ½ cup butter over medium heat. Add the diced yellow onion and cook for 5 minutes until it starts to soften and turn translucent. Then, add the 4 cloves minced garlic and cook for another 30 seconds until fragrant—you should smell that sweet, garlicky aroma filling your kitchen.
Here's the thing—don't let the garlic burn. It'll turn bitter fast, and you don't want that harsh flavor cutting through your creamy mac and cheese. Once the garlic is golden but not browned, remove the pan from heat and set it aside. This aromatic base will infuse the entire dish with deep, savory flavor.
Cook the Elbow Macaroni Al Dente
While your onion and garlic cool, bring a large pot of water to a rolling boil. Add 1.5 lbs elbow macaroni and cook until 1 minute before the package directions say it's done—this ensures it stays al dente when it finishes cooking in the oven. Drain the pasta, but don't rinse it. The starch on the pasta helps create that silky, creamy texture we're after.
I always taste a piece of the drained pasta to check for doneness. It should be firm to the bite but still slightly tender. If it's mushy, cook it a bit longer next time. The pasta will finish cooking in the oven, so don't overcook it now. Drain it directly into the Dutch oven with your onion and garlic mixture—this keeps everything warm and ready for the next steps.
Make the Cheese Sauce
Return the Dutch oven to medium heat and add the 1 cup warm whole milk, 1 cup heavy whipping cream, 2 tbsp Pepper Belly Pete Seasoning, 1 tsp smoked paprika, ½ tsp cayenne pepper, ½ tsp black pepper, and 1 tsp salt. Stir to combine, then gradually add the 2 cups sharp white cheddar cheese, 1 cup medium cheddar cheese, and 8 oz cream cheese, stirring constantly until fully melted and smooth.
This is where the magic happens. The cream cheese gives that ultra-creamy texture, while the sharp cheddars add that perfect tangy kick. If the sauce starts to look too thick, add a splash of pasta water to loosen it up. You want it to coat the back of a spoon but still be pourable. Once everything is melted and smooth, stir in the chopped bacon—those crispy bits will melt slightly, creating the perfect contrast of textures.
Combine and Bake to Crispy Perfection
Transfer the entire mixture to a 9x13-inch baking dish, spreading it out evenly. The goal is to create a thick, even layer so the top gets properly crispy. Pop it in a 375°F oven for 20-25 minutes until the edges are golden brown and the top has a crispy, almost crackly texture. If you want extra crispiness, broil for 1-2 minutes at the end—just watch it closely so it doesn't burn.
When it's done, let it rest for 5 minutes before serving. This resting time lets the cheese set up just enough to hold its shape, making it easier to slice and serve. The result should be a creamy, cheesy masterpiece with a crispy bacon crust on top that'll make everyone at the table go back for seconds. Trust me, it's worth the wait!
Pro Tips For Making Pepper Belly Pete Mac And Cheese
- Melt Cheeses Separately: Sharp white cheddar and cream cheese behave differently—mix them first in a low-heat saucepan until smooth, then fold in the medium cheddar at the end. I learned this the hard way when my sauce split into greasy clumps because I dumped everything in at once.
- Salt the Pasta Water: Use 1½ tablespoons of salt per pound of elbow macaroni in the boiling water—this ensures the pasta absorbs flavor before it even hits the cheese sauce. Skimping here means bland noodles no matter how much cheese you add.
- Avoid Overmixing the Sauce: Once the cheeses melt, stir just until combined—no need to whip it like a batter. Overworking the sauce introduces air, which makes it grainy when it cools. A few gentle folds are all it takes.
- Use Cold Cream Cheese: Cut the cream cheese into small cubes and add it straight from the fridge to the warm sauce. This prevents clumping and guarantees a silky texture. I was skeptical until I tried it—now it’s non-negotiable.
Creative variations of pepper belly pete mac and cheese
Smoky Chipotle Twist
Swap the Pepper Belly Pete seasoning for 2 tbsp adobo sauce from canned chipotles (plus 1 tsp smoked paprika) for a deeper, smokier kick. Add ½ cup chipotle peppers in adobo to the sauce for extra heat and complexity.
Top with pickled red onions and cilantro for a Tex-Mex fusion that’s perfect for game day. 🌶️
Buffalo Blue Cheese
Replace the cheddar with 1.5 cups sharp blue cheese and add ½ cup hot sauce (like Frank’s RedHot) to the sauce. Stir in ¼ cup crumbled blue cheese at the end for tangy contrast.
Serve with celery sticks and carrot sticks for dipping. This version is a crowd-pleaser at parties and tailgates. 🔥
Lobster Luxe
Add 1 lb cooked lobster meat to the cheese sauce and fold it in gently. Top with crispy fried shallots and chives for a restaurant-worthy upgrade. This version is ideal for special occasions and feels like a decadent seafood mac and cheese. 💎
Breakfast Mac
Stir in 4 scrambled eggs and ½ cup cooked breakfast sausage into the cheese sauce. Top with chopped chives and a sprinkle of crumbled bacon. Serve with a side of toasted sourdough for a hearty brunch dish that’s as satisfying as it is delicious. 🍳
Vegan Version
Use 1.5 lbs vegan elbow macaroni and replace the dairy cheeses with 2 cups vegan cheddar shreds (like Violife) and 8 oz vegan cream cheese (like Kite Hill).
Add 1 tbsp nutritional yeast for a cheesy flavor. Top with smoked paprika and vegan bacon bits for a plant-based twist that still delivers big flavor. 🌱
Keto-Friendly
Replace the pasta with 1 lb cauliflower rice (sautéed until tender) and use ½ cup heavy cream instead of milk. Add 1 cup shredded mozzarella and ½ cup grated Parmesan for a lower-carb version that’s just as rich. Top with crispy bacon and parsley** for a keto-friendly comfort dish. 🥦
Nutrition facts
Frequently asked questions
What makes Pepper Belly Pete's mac and cheese different from regular recipes?
The signature twist comes from the Pepper Belly Pete seasoning blend, which adds smoky depth with smoked paprika and a subtle cayenne kick. The recipe also uses a bacon-crusted topping baked until crispy, creating a perfect texture contrast with the creamy cheese sauce.
Can I substitute the Pepper Belly Pete seasoning?
Mix 1 tbsp smoked paprika, 1 tsp cayenne pepper, and 1 tsp black pepper for a similar smoky-spicy flavor. For extra depth, add ½ tsp liquid smoke. The key is balancing heat and smokiness without overpowering the cheesy base.
How do I prevent the mac and cheese from getting watery?
Never rinse the pasta after cooking—starch helps thicken the sauce. Use full-fat dairy (heavy cream, cream cheese) and stir in the cheese gradually. If the sauce looks too thin, remove it from heat and let it thicken naturally for 2-3 minutes. For extra insurance, add 1 tbsp cornstarch mixed with water.
Can I make this ahead of time?
Yes! Assemble the dish (without baking) up to 24 hours ahead and refrigerate. Bake straight from the fridge at 375°F for 30-35 minutes, covering with foil for the first 20 minutes to prevent over-browning. Leftovers reheat beautifully—just cover with foil and warm in the oven at 350°F for 15 minutes.
What's the best way to reheat Pepper Belly Pete's mac and cheese?
For the crispy topping, reheat in a 350°F oven for 15 minutes covered with foil, then uncover for the last 2-3 minutes to restore crispiness. Microwave reheating works too—cover with a damp paper towel and heat in 30-second intervals, stirring between each. Avoid boiling the cheese sauce!