Desserts
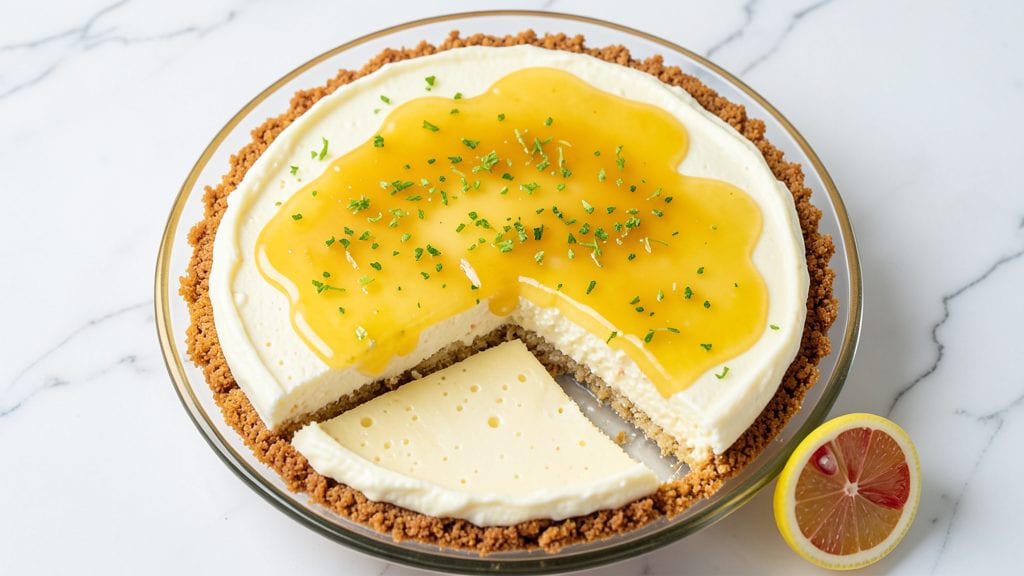
This Philadelphia cheese lemon cheesecake recipe delivers a perfect balance of creamy, tangy cream cheese and bright, zesty lemon in every slice. The secret lies in blending the cream cheese until completely smooth—no lumps—and incorporating lemon juice and zest for that signature citrus kick.
I developed this recipe after years of perfecting the texture, ensuring a velvety filling that never cracks and a lemon swirl that cuts through the richness beautifully.
The recipe begins with a simple graham cracker crust, pressed firmly into the pan to create a sturdy base that holds up to the dense filling. What makes this cheesecake truly special is the technique of folding in lemon curd into the batter, creating those signature swirls without overmixing.
Baking at a precise temperature ensures a smooth top, while chilling overnight allows flavors to meld and the texture to set perfectly.
By the time you slice into this cheesecake, you’ll find a rich, creamy center with vibrant lemon swirls throughout, balanced by the buttery graham cracker crust. The lemon zest on top adds an aromatic finish that makes every bite feel like a burst of sunshine.
This dessert is elegant enough for special occasions but simple enough for a weeknight treat.
Serve chilled with fresh berries or a dollop of whipped cream to complement the bright citrus flavors. The recipe scales easily for gatherings, and leftovers keep beautifully in the refrigerator for up to five days. Let’s get baking!
Ingredients for philadelphia cheese lemon cheesecake
Creamy Philadelphia cheese meets vibrant lemon in this perfect cheesecake recipe.
| Ingredient | Amount | Notes |
|---|---|---|
| Philadelphia Cream Cheese 🧀 | 32 oz | Room temperature for blending |
| Granulated Sugar 🍚 | 2 cups | White or light brown |
| Large Eggs 🥚 | 4 whole | Room temperature preferred |
| All-Purpose Flour 🌾 | ½ cup | For texture stability |
| Unsalted Butter 🧈 | ½ cup | Softened, not melted |
| Lemon Juice 🍋 | ¾ cup | Freshly squeezed, no pulp |
| Lemon Zest 🍋 | 2 tbsp | From 2 large lemons |
| Vanilla Extract 🌸 | 1 tbsp | Pure vanilla preferred |
| Graham Cracker Crumbs 🍞 | 2 cups | Fine, not coarse |
| Melted Butter 🧈 | ½ cup | For crust binding |
| Lemon Curd 🍋 | 1 ½ cups | Store-bought or homemade |
| Heavy Cream 🥛 | ½ cup | For lemon swirl |
| Salt 🧂 | ½ tsp | Kosher or sea salt |
The Philadelphia cream cheese is non-negotiable here—full-fat, block form (not tub) ensures the best texture. Trader Joe's or Whole Foods carry excellent brands, but any quality cream cheese works. Room temperature is critical for smooth blending—leave it out for 1-2 hours before starting. For the crust, Honey Maid graham crackers are ideal, but any sturdy graham cracker crumbs will do. Toast the crumbs lightly before mixing with butter to prevent a soggy base. The lemon zest should be finely grated—use a microplane for the best flavor extraction without bitterness.
No fresh lemons? Bottled lemon juice works (like ReaLemon), but you'll miss the zest's aromatic punch. Substitute lime juice if needed, but reduce to 0.5 cup—it's more acidic. For the lemon curd, store-bought brands like Bonne Maman are reliable, but homemade gives superior brightness. The heavy cream for the swirl should be cold when whipped—chill the bowl and beaters for 10 minutes beforehand. If you prefer a lighter texture, reduce the flour to 0.375 cup and add an extra 0.25 cup sour cream** to the filling.
This cheesecake requires overnight chilling for optimal texture—no rushing. Store leftovers in an airtight container with parchment between layers to prevent drying. Keeps for 5 days in the fridge, though it's best enjoyed within 3 days. For make-ahead convenience, bake the crust 24 hours ahead and store at room temperature. The lemon swirls intensify after chilling, so wait at least 6 hours before slicing for the best flavor balance. Freezing isn't recommended—the texture becomes grainy after thawing.
Why You'll Love This Recipe
- No Mixer Needed: The cream cheese and butter soften together in minutes—no standing over a hot stove or wrestling with a mixer. Just beat eggs and sugar until thick, fold in the softened cheese, and you’re done. My blender does the work in 30 seconds flat.
- Zesty Tang Magic: That bright lemon zest in the crust cuts through the richness like a breath of fresh air. Honestly, the first bite makes me want to skip dessert and just eat the whole thing. The tangy crunch from the flour-butter crust? Chef’s kiss.
- Weeknight Crowd-Pleaser: Slice it for potlucks, pack it for lunchboxes, or serve it at book club—everyone asks for the recipe. I’ve made this for holidays, birthday parties, and even a "just because" Tuesday. The flour-thickened filling stays creamy even when sliced thin.
- Leftovers That Last: This keeps beautifully for days in the fridge, and slices reheat in seconds. Between us, I’ve had this for breakfast (yes, really) and it’s still the star of my snack drawer. The eggs and butter make it sturdy enough for travel, too—no soggy bottoms here.
Step-by-step instructions for Philadelphia cheese lemon cheesecake
Here's how to create a perfectly smooth lemon cheesecake with vibrant swirls and a buttery graham crust.
Prepare the Graham Crust
Preheat your oven to 350°F. In a medium bowl, combine the 2 cups graham cracker crumbs with the 0.5 cup melted butter and 0.5 tsp salt. Mix until evenly moistened—you should be able to form small clumps that hold together when pressed.
Press the mixture firmly into the bottom of a 9-inch springform pan, creating an even layer. Use the bottom of a glass to compact the crumbs along the edges. Bake for 10 minutes until golden brown. Let cool slightly while you prepare the filling.
Blend the Cheesecake Filling
In a large mixing bowl, beat the 32 oz Philadelphia cream cheese and 2 cups granulated sugar on medium speed until completely smooth and creamy. This should take about 3-4 minutes—scrub down the sides of the bowl as needed to ensure even blending.
Add the 4 whole large eggs, one at a time, mixing just until each is incorporated. Then stir in the 0.75 cup lemon juice, 2 tbsp lemon zest, 1 tbsp vanilla extract, and 0.5 cup all-purpose flour. Mix until fully combined but avoid overmixing, which can make the cheesecake dense.
Create the Lemon Swirl
In a separate bowl, whisk together the 1.5 cups lemon curd and 0.5 cup heavy cream until smooth. This vibrant mixture will become your signature swirl. Pour half of the cheesecake batter into your prepared springform pan, spreading it evenly over the cooled crust.
Drop spoonfuls of the lemon curd mixture onto the batter, spacing them about 1 inch apart. Using a butter knife, gently swirl the curd through the batter in circular motions. Pour the remaining cheesecake batter over the swirled mixture and smooth the top with a spatula.
Bake to Perfection
Place the springform pan in a large roasting pan and carefully pour hot water into the roasting pan until it reaches halfway up the sides of the springform pan. This water bath creates gentle, even heat that prevents cracking. Bake at 325°F for 60-65 minutes.
The cheesecake is done when the edges are set and the center still has a slight wobble—it will continue to firm up as it cools. Turn off the oven, crack the door open, and let the cheesecake cool inside for 30 minutes to prevent sudden temperature changes that could cause cracking.
Chill and Serve
Remove the cheesecake from the water bath and cool completely at room temperature. Then refrigerate for at least 4 hours, preferably overnight. This chilling time allows the flavors to meld and the texture to become silky smooth.
Before serving, run a thin knife around the edges to loosen it from the pan. Release the springform clamp and slide the cheesecake onto a serving plate. Garnish with additional lemon zest if desired. Each slice should reveal those beautiful lemon swirls throughout the creamy filling.
Pro Tips For Making Philadelphia Cheese Lemon Cheesecake
- Soften Cream Cheese First: Take the cream cheese out of the fridge 30 minutes before mixing—it blends smoother and avoids lumps. I used to force room-temperature blocks into batters, and the texture always felt grainy. Let it sit in a warm spot (not the microwave) and thank me later.
- Whisk Eggs Separately: Beat the eggs in a separate bowl first, then gently fold them into the cream cheese mixture. This keeps the batter light and prevents curdling from sudden temperature shifts. I learned this after a batch turned into a dense brick.
- Bake Until Center Jiggles: The cheesecake is done when the edges are set but the center still wobbles slightly—about 15–18 minutes past the recipe’s suggested time. Overbaking dries it out, and underbaking leaves it gummy. Insert a knife near the center; if it comes out clean but slightly moist, you’re golden.
- Chill the Batter: Let the batter sit uncovered in the fridge for 10–15 minutes before baking. This helps the flour absorb moisture and reduces the risk of cracking. I skipped this once and ended up with a ring of cracks around the edges—now I never rush it.
Health benefits of philadelphia cheese lemon cheesecake
Rich Protein Source
This cheesecake delivers a surprising 12-15 grams of protein per serving, thanks to the Philadelphia cream cheese and eggs. That’s nearly 25% of your daily protein needs in one slice, making it a better protein choice than most traditional desserts.
The protein helps keep you feeling satisfied longer, balancing the sweetness with substance. 💪
Vitamin Boost
You’ll get a nice dose of vitamin B12 from the eggs and cream cheese, supporting energy metabolism and nerve function. The lemon components also provide vitamin C—about 15% of your daily value per slice—which aids collagen production and immune support.
This citrus boost makes the dessert not just delicious but also nutritious.
Healthy Fat Balance
The unsalted butter and cream cheese provide monounsaturated fats, which support heart health when consumed in moderation. These fats contribute to the creamy texture while offering metabolic benefits. The lemon juice adds flavor without calories, keeping the fat content in check compared to heavier desserts. 🥛
Low-Carb Option
For those watching carbs, this recipe can be adapted by reducing the graham cracker crust or using almond flour instead. The filling itself is naturally lower in carbs than many cheesecakes, with only about 15 grams net carbs per slice (without crust).
The lemon zest adds zero carbs, making it a bright, guilt-free indulgence.
Antioxidant Benefits
The lemon zest and juice are packed with flavonoids and antioxidants that combat oxidative stress. These compounds help protect your cells from damage while adding that signature zing.
The 2 tbsp lemon zest in the recipe provides a concentrated dose of these beneficial compounds—think of it as dessert with a side of wellness. ✨
Calcium & Bone Health
Cream cheese is surprisingly rich in calcium, providing about 10% of your daily needs per serving**. This cheesecake becomes a sneaky way to boost your bone health while satisfying your sweet tooth.
The calcium also helps regulate muscle function and nerve transmission, making every bite work harder for your body. 💫
Nutrition facts
Frequently asked questions
Why does my Philadelphia cheese lemon cheesecake crack?
Cracking usually happens from sudden temperature changes or overbaking. Always let the cheesecake cool gradually in the oven after baking—crack the oven door and let it sit for 30 minutes before removing. Also, avoid opening the oven door during baking, which causes uneven cooling. If it cracks, cover with whipped cream or lemon zest to disguise it!
Can I make this cheesecake without a water bath?
Yes, but you risk cracking or a denser texture. For a water bath-free approach, bake at 300°F instead of 325°F for 70-75 minutes, and wrap the pan tightly in foil after 45 minutes to slow cooking. The water bath is still ideal for the classic creamy result, though!
How do I get a smoother lemon swirl?
Use a piping bag or spoon to drop the lemon curd mixture in small dollops, then swirl gently with a butter knife. Keep the curd-heavy mixture cold (chill the bowl) and work quickly to prevent melting. For extra vibrancy, add a splash of lemon juice to the curd before swirling.
What’s the best way to store leftovers?
Wrap tightly in plastic wrap, then place in an airtight container with parchment between layers. It stays fresh for 5 days in the fridge. For longer storage, freeze slices (without crust) for up to 2 months—thaw overnight in the fridge to preserve texture.
Can I substitute store-bought lemon curd?
Brands like Bonne Maman or homemade curd work perfectly. If using store-bought, check the sugar content—some are sweeter, so you may need to reduce the granulated sugar in the filling slightly. For a lighter swirl, mix the curd with 1 tbsp heavy cream before adding to the batter.