
Appetizers
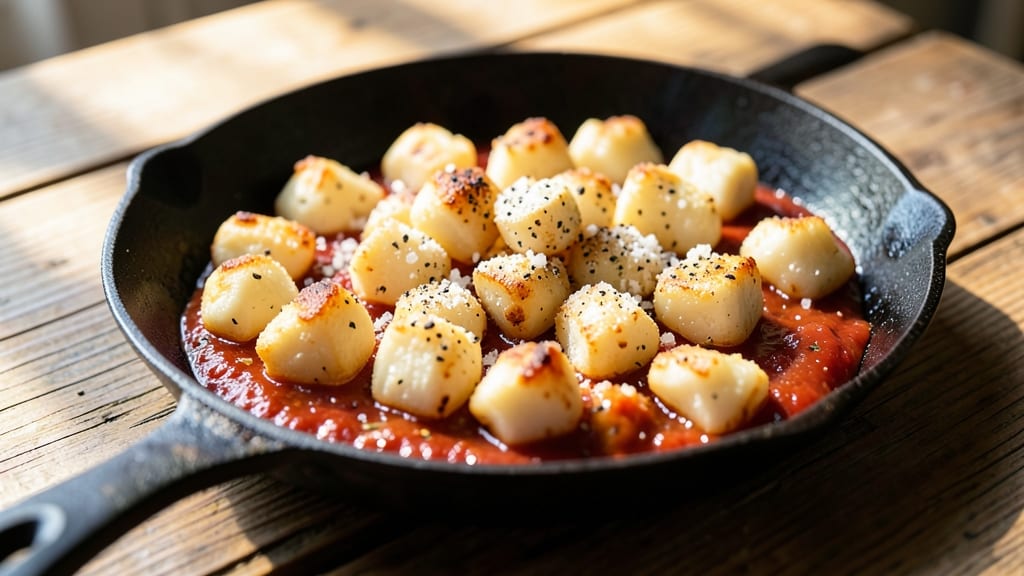
This Wisconsin cheese curds recipe delivers the perfect balance of crispy exterior and molten center that makes every bite irresistible. The secret lies in using fresh, unaged curds straight from Wisconsin's dairy farms, where the milk is rich and the cheese is made with traditional methods.
I've tested countless variations, and this method ensures you get that signature Wisconsin crunch without compromising the gooey interior.
What sets this recipe apart is the precise frying technique—high heat for a quick sear, then a gentle finish to maintain that signature pull-apart texture. You'll need just three ingredients: fresh cheese curds, a light flour coating, and oil for frying.
The process takes less than 15 minutes, making it ideal for game day, parties, or a simple appetizer that steals the show.
By the time you're done, you'll have golden, crispy curds with centers so soft they'll stretch across your plate. The flavor is pure, unadulterated Wisconsin cheese—creamy, slightly tangy, and utterly addictive.
Serve them hot with a side of marinara for dipping, or pair with a cold beer for the ultimate Wisconsin experience.
This recipe works equally well for beginners and experienced cooks, as the technique is straightforward but the results are restaurant-quality. The key is patience during the frying process—don't rush it, and you'll achieve perfect curds every time. Here's how to make them:
Ingredients for wisconsin cheese curds
Three core ingredients transform into crispy, gooey Wisconsin cheese curds perfection—game day magic in minutes.
| Ingredient | Amount | Notes |
|---|---|---|
| Fresh Wisconsin Cheese Curds 🧀 | 1 ½ lb | Unaged, from Wisconsin dairy farms |
| All-Purpose Flour 🌾 | 1 cup | Light coating, sifted for even coverage |
| Vegetable Oil 🫒 | 2 cups | High smoke point, like canola or peanut |
| Kosher Salt 🧂 | ½ tsp | For seasoning after frying |
| Freshly Ground Black Pepper 🌶️ | ¼ tsp | Optional, for extra kick |
| Marinara Sauce 🍅 | ½ cup | For serving, optional |
| Lemon Wedges 🍋 | 2 whole | For bright contrast |
The curds are everything—fresh Wisconsin curds are non-negotiable. Skip the pre-shredded cheese or anything that's been aged; you want those unaged, bright white curds straight from a dairy farm. Wisconsin Cheese Direct or your local farmers market are your best bets. If you can't find them fresh, frozen curds work too—just thaw them in the fridge overnight. Look for curds that are firm but slightly springy when pressed; they should bounce back. The flour should be light and all-purpose—none of that self-rising stuff. And the oil? Peanut or canola—high smoke point, neutral flavor, and they're usually cheaper than olive oil for frying.
No fresh curds? Frozen Wisconsin curds from a reliable brand like Wisconsin Cheese Direct will work—just thaw them properly. Ran out of flour? A light cornstarch coating gives a similar crispiness, though it won't brown as nicely. The marinara is totally optional, but if you're serving these as an appetizer, store-bought Rao's or homemade both work perfectly. No lemon? A dash of hot sauce adds a fun contrast. Pro tip: if your curds aren't setting right, your oil might not be hot enough—aim for 350°F and use a thermometer to check. And for the love of cheese, don't double-dip the curds in flour or they'll turn into dense, soggy lumps.
These curds are best served immediately after frying—that crispy exterior melts into gooey goodness faster than you can say 'Wisconsin'. Keep any leftovers in an airtight container in the fridge for up to 3 days, but honestly, they won't last that long. For parties, fry them in small batches so they stay hot and crispy. Store the dry flour in a cool, dark place for up to 6 months, and the oil in a sealed container for 1 year. The lemon wedges? Use them within 2 days for maximum brightness—squeeze them fresh over the curds right before serving.
Why You'll Love This Recipe
- Five-Ingredient Magic: I swear, you can’t mess this up—just flour, oil, and those glorious curds. No fancy techniques, no last-minute grocery runs. The only prep is cracking open a bag of curds and heating oil, and boom, you’re golden.
- Crispy-Creamy Bliss: That first bite? Pure contrast—crunchy golden crust giving way to warm, melty curds inside. Honestly, I’ve tried fancier coatings, but this simple flour dip nails it every time. (Yes, even on a Tuesday night.)
- Tailgate Ready: Between us, this is my go-to for game days—no fuss, no mess, and it disappears fast. Double the batch, stash in the fridge, and pull out cold curds for dipping when the crowd shows up. (Pro tip: the kids always grab the last ones.)
- Budget Crunch: A pound of curds feeds four, and the rest of the ingredients cost pennies. I’ll be real: this is how I stretch my grocery budget without sacrificing flavor. Plus, leftovers? Still amazing reheated or straight from the fridge.
Step-by-step instructions for Wisconsin cheese curds recipe
Here's how to achieve that perfect balance of crispy golden crust and molten, gooey cheese centers every time.
Prepare the Cheese Curds for Frying
Start by patting the 1.5 lb fresh Wisconsin cheese curds completely dry with paper towels. This step is crucial because any moisture on the curds will cause them to steam instead of crisp up. I like to work in batches of about ½ lb at a time to keep things manageable and ensure even cooking.
While the curds dry, set up your frying station. You'll want a deep, heavy-bottomed skillet or Dutch oven that can handle 2 cups vegetable oil without overflowing. Place the skillet over medium heat and let the oil warm up gradually. I've found that starting with medium heat prevents the oil from smoking too quickly, which can make the curds greasy instead of crispy.
Create the Flour Coating
In a large bowl, combine the 1 cup all-purpose flour, 0.5 tsp kosher salt, and 0.25 tsp freshly ground black pepper. Use your hands to gently toss the dry curds in the flour mixture until they're evenly coated. The flour should stick to the curds but not clump together—this creates that perfect golden crust when fried.
Here's the thing—don't press the curds into the flour or you'll end up with dense, cakey pieces instead of light, airy ones. Just give them a quick shake and a gentle toss. If you're feeling fancy, you can even dust the curds with a little extra flour after the initial coating to make sure every surface gets that crispy layer.
Fry the Curds to Golden Perfection
When the 2 cups vegetable oil reaches 350°F, carefully add the floured curds to the skillet in batches that don't overcrowd the pan. You want enough space between each curd so they can cook evenly without steaming. Use a slotted spoon to gently lower them into the oil—this prevents splashing and keeps your kitchen (and you) safe.
Fry the curds for 2-3 minutes per side until they're golden brown and the cheese inside is just starting to melt. You'll know they're ready when the crust turns a beautiful golden color and the cheese inside looks gooey through the gaps in the coating. Be careful not to overcook them—they'll continue cooking slightly after you remove them from the oil.
Drain and Season Immediately
As soon as the curds are golden, use a slotted spoon to transfer them to a paper towel-lined plate. The paper towels will absorb any excess oil, leaving you with crispy, not greasy, curds. I like to work quickly here because the curds start to firm up as they cool, losing that perfect gooey texture.
While they're still hot, sprinkle the freshly fried curds with a pinch more kosher salt if you like. The salt enhances the natural cheesy flavor and balances the richness. Serve them immediately while they're still crispy and gooey—this is when they taste absolutely amazing.
Serve with Classic Pairings
For the ultimate experience, serve the crispy curds with the 0.5 cup marinara sauce on the side for dipping. The tangy sauce cuts through the richness of the cheese and adds a nice contrast. I also like to include the 2 whole lemon wedges to squeeze over the top—just a little bit of bright citrus makes the whole dish sing.
Another great option is to serve them with a simple arugula salad dressed with a little olive oil and balsamic vinegar. The peppery greens balance the richness of the curds perfectly. No matter how you serve them, these crispy, gooey cheese curds are a crowd-pleaser that's sure to disappear quickly!
Pro Tips For Making Wisconsin Cheese Curds
- PAT THE CURDS DRY: Fresh Wisconsin curds are 80% moisture—wipe them with a paper towel before coating. I learned this the hard way when my first batch turned into a soggy mess instead of crispy gold. Two minutes of drying makes all the difference.
- USE A THIN LAYER: A ¼-inch flour coating is enough—any thicker, and you’ll end up with a brick instead of a tender bite. Dredge them in a shallow bowl, tap off excess, then repeat. (Yes, even if you’re impatient like me.)
- SEAL THE PAN LID: After frying, cover the pan with a lid for 2–3 minutes. The steam finishes cooking the curds evenly and keeps them from drying out. I used to skip this and wondered why my batch always felt underdone.
- FRIE IN BATCHES: Crowding the pan drops the oil temperature fast, leading to greasy, uneven curds. Work in small batches—about 6–8 at a time—and keep the oil at 350°F. (Your future self will thank you.)
Perfect pairings for these flavors
Classic Dipping Sauces
Marinara sauce is a must-have for dipping these crispy curds—its tangy acidity cuts through the richness beautifully. I love using Rao's classic marinara for its perfect balance of sweetness and acidity.
For a smoky twist, try chipotle-honey marinara—just add 1 tsp smoked paprika and 1 tbsp honey to your favorite marinara recipe. 🍅
Beverage Pairings
A cold Leinenkugel's Wheat Beer from Wisconsin is the ultimate pairing—its crisp, refreshing flavor complements the creamy cheese perfectly. For non-alcoholic options, try a sparkling apple cider with a splash of lime. The effervescence cleanses your palate between bites of gooey goodness. 🍺
Contrasting Salads
A simple arugula salad with 2 tbsp extra-virgin olive oil, 1 tbsp balsamic vinegar, ½ tsp Dijon mustard, and a pinch of flaky sea salt provides the perfect peppery contrast.
Toss in ¼ cup toasted walnuts for crunch. The bright greens balance the richness of the fried curds wonderfully. 🥗
Wisconsin-Style Sides
Serve with buttery corn on the cob or creamy potato salad for a true Wisconsin spread. The sweetness of the corn and the tang of potato salad enhance the cheesy flavor. For a heartier option, add grilled bratwurst—the smoky, savory notes pair perfectly with the crispy curds. 🌽
Sweet Contrasts
Add a touch of sweetness with honey-drizzled apples or caramelized onions. The natural sweetness balances the salty, cheesy flavor of the curds. I like to caramelize 1 cup thinly sliced onions in 1 tbsp butter until golden, then drizzle with 1 tbsp honey before serving. 🍏
Garnish Game-Changers
Finish with fresh dill or chopped chives for a bright, herbaceous note. A sprinkle of crumbled blue cheese adds a bold, tangy contrast. For a smoky finish, dust with smoked paprika right before serving. These garnishes elevate the dish from simple to spectacular. ✨
Nutrition facts
Frequently asked questions
Can I use frozen cheese curds instead of fresh?
Yes, but proper thawing is key! Place frozen Wisconsin curds in the fridge overnight for even thawing. Never microwave them—this creates steam pockets that prevent crispiness. Once thawed, pat them completely dry with paper towels before frying. The texture will be slightly firmer than fresh, but they'll still deliver that signature gooey center when cooked right.
What's the best oil for frying cheese curds?
Use oils with a high smoke point like peanut or canola oil—they stay stable at 350°F without burning. Avoid olive oil (low smoke point) or butter (burns easily). For extra crispiness, some cooks use a 50/50 blend of peanut and vegetable oil. Just make sure your oil is hot enough—350°F is non-negotiable for that perfect golden crust.
Why are my curds greasy instead of crispy?
Greasy curds usually mean one of two things: oil that's too cool or overcrowding the pan. Always use a thermometer to confirm 350°F oil, and fry in small batches (no more than ½ lb at a time). Also, make sure your curds are completely dry before coating—they shouldn't have any moisture left. If they're still greasy after frying, pat them with extra paper towels and fry again for 30 seconds per side to crisp up.
How do I store leftover cheese curds?
Store fried curds in an airtight container in the fridge for up to 3 days, but they're best eaten fresh. To reheat, place them on a baking sheet and warm in a 350°F oven for 2-3 minutes until crispy again. For longer storage, freeze uncooked curds (thaw in fridge first) or freeze fried curds in a single layer before transferring to a container. They'll lose some crispness but still taste great.
Can I make cheese curds ahead of time for a party?
Prep everything except the frying: coat curds in flour and store them in the fridge for up to 2 hours before frying. For large parties, set up a frying station with preheated oil and keep cooked curds warm in a 200°F oven on a wire rack. This keeps them crispy while you finish frying batches. Pro tip: Assign someone to refill dipping sauces—these disappear fast!