
Salads
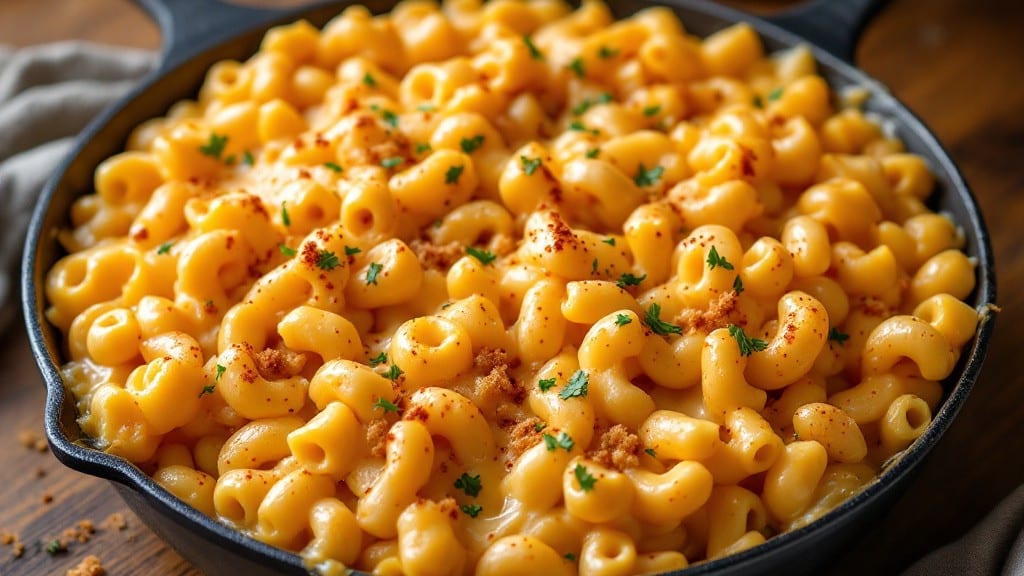
This old-fashioned baked macaroni and cheese recipe delivers the crispy-topped, melty-cheese nostalgia we all remember from childhood. The secret lies in a precise balance of sharp cheddar and creaminess, baked just until the edges turn golden while the center stays rich and velvety.
I've perfected this version after years of testing—no shortcuts, just the classic method that makes every bite satisfying.
The foundation starts with perfectly cooked elbow macaroni, tossed in a velvety cheese sauce made from butter, flour, and milk. Layered with buttery breadcrumbs on top, this dish transforms into a comforting masterpiece that's crispy where it counts and unctuous throughout.
The slow baking process ensures the cheese melts evenly, creating that signature pull-apart texture that makes this dish legendary.
What you'll end up with is a dish that tastes like home—golden, bubbling edges that contrast beautifully with the creamy, cheesy center.
The aroma alone will have everyone gathering around the table, and the first bite delivers that perfect combination of textures and flavors that make this recipe a timeless comfort food classic.
Serve this with a simple green salad or crusty bread to soak up every last bit of that rich, cheesy goodness. The recipe scales easily, making it perfect for family dinners or gatherings where you want to bring back the nostalgia of homemade, old-fashioned mac and cheese.
Ingredients for old fashioned baked macaroni and cheese
Pantry staples and a few key cheeses transform into nostalgic, crispy-topped comfort.
| Ingredient | Amount | Notes |
|---|---|---|
| Elbow Macaroni 🍝 | 1 ½ lbs | Medium or extra-large size preferred |
| Sharp White Cheddar Cheese 🧀 | 2 cups | Freshly grated from block |
| Unsalted Butter 🧈 | ¾ cup | Cold, cubed for sauce |
| All-Purpose Flour 🌾 | ½ cup | For roux, sifted |
| Whole Milk 🥛 | 2 ½ cups | Full-fat for creaminess |
| Yellow Onion 🧅 | 1 whole | Finely diced, small |
| Garlic Cloves 🧄 | 4 cloves | Minced for depth |
| Dry Breadcrumbs 🍞 | ½ cup | Panko for extra crisp |
| Extra-Virgin Olive Oil 🫒 | 2 tbsp | For breadcrumb topping |
| Kosher Salt 🧂 | 1 ½ tsp | Adjust to taste |
| Ground Black Pepper 🌶️ | ½ tsp | Freshly cracked |
| Mustard Powder 🍽️ | ¼ tsp | For subtle tang |
| Gruyère Cheese 🧀 | ½ cup | Optional for complexity |
The cheddar is non-negotiable—sharp white cheddar from a block, freshly grated, makes all the difference. Whole Foods or specialty cheese shops carry the best, but a good grocery store selection works too. Look for vibrant color and minimal crumbles. Gruyère adds depth if you're feeling fancy, but classic cheddar delivers that nostalgic flavor. For the breadcrumbs, panko gives extra crispiness, but plain dry breadcrumbs work in a pinch. The macaroni should be medium or extra-large—smaller shapes can get mushy during baking.
No sharp cheddar? Extra-sharp cheddar works, but it's stronger—reduce to 1.75 cups. Substitute Gruyère with more cheddar if needed. For the roux, butter and flour must be cold to avoid lumps. If you're gluten-free, swap flour for all-purpose gluten-free flour blend (add 1 tsp xanthan gum). The mustard powder is optional but adds a subtle tang that balances the richness. For the breadcrumb topping, olive oil is key—it helps create that golden, crispy crust. No panko? Toast regular breadcrumbs in a dry pan for 2-3 minutes first.
This dish reheats beautifully—best served warm straight from the oven. Store leftovers in an airtight container for up to 4 days, though the texture softens slightly. For longer storage, freeze portions for up to 3 months. To reheat, cover with foil and bake at 350°F (175°C) until bubbly. The breadcrumb topping can be made ahead and stored in the fridge for up to 1 week, though it's best used fresh for maximum crispiness.
Why You'll Love This Recipe
- No-Fuss Stovetop Start: I swear by the roux method—just melt butter, whisk in flour, then slowly add milk until it thickens like a dream. No blender, no stress, just elbow grease (literally, for the pasta) and a pot that’s basically self-cleaning.
- Sharp Cheddar Magic: That sharp white cheddar? It’s the star. The flour-butter roux gives it a velvety base, but the cheese melts into gooey pockets that make every bite satisfying. Honestly, I’ve tried pre-shredded—don’t. Freshly grated changes everything.
- Weeknight to Potluck: Make a double batch on Sunday, bake it up, and you’ve got lunch, dinner, or a crowd-pleasing side covered. My kids grab it straight from the fridge for school lunches, and it still tastes like it just came out of the oven.
- Budget-Friendly Leftovers: Five dollars buys enough cheese and pasta to feed four. The best part? Leftovers reheat like a champ—just a splash of milk to loosen it up. I’ve had this for breakfast, lunch, and dinner without getting tired of it. (Yes, even on a Tuesday night.)
Step-by-step instructions for old fashioned baked macaroni and cheese
Here's how to achieve that perfect balance of crispy golden topping and creamy cheese every time.
Cook the Elbow Macaroni Al Dente
Bring a large pot of water to a rolling boil and add 1.5 pounds of elbow macaroni. Season the water generously with salt—it should taste like the sea. Cook the pasta until it's 1 minute shy of the package directions for al dente. You want it to have a slight bite when bitten, as it will continue cooking in the oven.
Drain the pasta in a colander and rinse it briefly with cool water to stop the cooking process. Shake the colander gently to remove excess water, but don't rinse it completely dry. The pasta should still be slightly damp—this helps the cheese sauce cling better. Transfer the drained pasta to a large mixing bowl and set it aside.
Prepare the Creamy Cheese Sauce
In a medium saucepan, melt 0.75 cup of unsalted butter over medium heat. Once the butter is fully melted and foaming, whisk in 0.5 cup of all-purpose flour to create a roux. Cook the roux for 2-3 minutes, stirring constantly, until it turns a light golden color and smells nutty. This step is crucial for thickening the sauce properly.
Gradually whisk in 2.5 cups of whole milk, about ½ cup at a time, allowing each addition to be fully incorporated before adding more. The mixture will thicken as it cooks. Once all the milk is added, stir in 2 cups of freshly grated sharp white cheddar cheese, 0.5 cup of gruyère cheese, 1.5 teaspoons of kosher salt, 0.5 teaspoon of ground black pepper, and 0.25 teaspoon of mustard powder. Continue cooking for 3-5 minutes until the sauce is smooth and fully melted. Remove the sauce from heat and stir in the cooked elbow macaroni until evenly coated.
Assemble and Bake for Crispy Topping
Preheat your oven to 375°F. Lightly grease a 9x13-inch baking dish with a small amount of olive oil or butter. Transfer the macaroni and cheese mixture to the prepared baking dish and spread it evenly. In a small bowl, combine 0.5 cup of dry breadcrumbs, 2 tablespoons of extra-virgin olive oil, 1 tablespoon of melted butter, 0.5 teaspoon of kosher salt, and 0.25 teaspoon of ground black pepper. Sprinkle this breadcrumb mixture evenly over the top of the macaroni and cheese.
Bake for 25-30 minutes until the top is deep golden brown and the edges are bubbling. The cheese sauce should be fully melted and creamy, with a crispy, crackly crust on top. If the top isn't brown enough after 25 minutes, broil for 1-2 minutes on high, watching closely to avoid burning. Remove from the oven and let it rest for 5-10 minutes before serving. This resting time allows the cheese to set slightly, making it easier to slice.
Add Aromatics for Extra Flavor (Optional)
For added depth of flavor, you can sauté 1 whole finely diced yellow onion and 4 cloves minced garlic in 1 tablespoon of butter until softened. Stir this mixture into the cheese sauce before transferring it to the baking dish. This step is optional but adds a rich, savory note that complements the creamy cheese perfectly.
Serve the macaroni and cheese hot, straight from the baking dish. The crispy topping will give way to the creamy, cheesy goodness beneath, creating the perfect balance of textures that makes this dish so nostalgic and satisfying.
Pro Tips For Making Old Fashioned Baked Macaroni And Cheese
- Cook the Pasta Al Dente: Old-fashioned recipes mean actually al dente—no mushy elbows. Taste-test a piece before draining; it should resist slightly. I learned this the hard way after serving a pot where the pasta turned to glue in the oven.
- Shred Cheese Like a Pro: Skip the food processor for sharp cheddar—it turns to paste. Use a box grater and work in batches, or pulse in short bursts (3-4 seconds max) in a food processor, then finish by hand. The goal is curds, not cheese dust.
- Whisk the Roux Aggressively: That butter-flour roux is your glue. Cook it on medium-low, stirring constantly with a wooden spoon until it’s a deep golden brown—like peanut butter, not beige. I used to rush this, and the sauce always tasted flat.
- Bake Under Foil First: Cover the casserole with foil for the first 20 minutes. This locks in moisture so the top doesn’t dry out while the edges brown. Pull the foil early if the cheese is bubbling like a volcano—you want a custard, not a crust.
Essential equipment for old fashioned baked macaroni and cheese
Baking Dish Essentials
Your 9x13-inch baking dish is the unsung hero of this recipe. I use Ceramic CorningWare because it distributes heat evenly and holds up to the high temperatures needed for that perfect golden crust.
If you don’t have one, a heavy-duty stainless steel or dark-colored enameled cast iron pan works too—just avoid thin aluminum, which can cause hot spots. Always grease it lightly with butter or olive oil to prevent sticking, even if your dish is nonstick. 🧊
Cheese Grater Matters
Freshly grated cheese makes all the difference, so invest in a microplane or box grater with sharp blades. I prefer the OXO Good Grips for its precision and ease of use. Pre-shredded cheese contains anti-caking agents that prevent proper melting, so grating your own is a must.
For Gruyère, use a fine-hole grater to avoid large chunks that won’t melt smoothly. Store your grated cheese in an airtight container in the fridge for up to 3 days to preserve freshness. 🧀
Roux Whisk Pro Tips
A heat-resistant silicone whisk like the OXO Good Grips is perfect for making the roux—it won’t melt and handles high heat like a champ. For a smoother sauce, sift your all-purpose flour first to avoid lumps.
If you’re making this on the stovetop, a medium saucepan with sloped sides helps prevent spills when whisking in the milk. Pro tip: Keep the heat medium-low while cooking the roux to avoid burning, which can make the sauce taste bitter. 🍳
Breadcrumbs & Oil
For that crispy, golden topping, use panko breadcrumbs—they’re lighter and crispier than regular breadcrumbs. Store-bought panko works, but I love making my own by toasting day-old bread in the oven at 350°F (175°C) for 10 minutes, then pulsing it in a food processor.
Mix the breadcrumbs with extra-virgin olive oil (not butter here—it can make the topping greasy) and a pinch of salt for extra flavor. A small mixing bowl with a fork works best for combining these ingredients evenly. 🍞
Temperature Control Tools
An instant-read thermometer like the ThermoWorks ThermoPop is a game-changer for ensuring your mac and cheese bakes to perfection. Check the internal temperature at 350°F (175°C)—it should reach 165°F (74°C) for safety. If your oven runs hot, reduce the temperature to 350°F (175°C) to avoid over-browning.
For even baking, place a small baking sheet under the dish to catch any drips or spills. A wire cooling rack helps prevent soggy bottoms when resting the dish. 🌡️
Nutrition facts
Frequently asked questions
Why does my mac and cheese turn out greasy instead of creamy?
Overmixing the cheese sauce or using too much butter creates greasiness. Always cook the roux on medium-low heat until golden, then add milk gradually. For extra creaminess, stir in a splash of whole milk at the end. Avoid pre-shredded cheese—it contains anti-caking agents that prevent proper melting.
Can I make this recipe ahead of time?
Assemble the dish (without baking) up to 24 hours ahead and refrigerate. When ready to bake, cover with foil and bake at 350°F (175°C) for 30-40 minutes until bubbly. The texture will be slightly firmer but still delicious. For best results, add a splash of milk before baking to restore creaminess.
What’s the secret to a crispy topping?
Three key factors: panko breadcrumbs, olive oil, and proper baking. Mix breadcrumbs with oil (not butter) and toast them lightly before adding. Bake at 375°F (190°C) until golden brown—don’t skip the broiler for extra crispiness. A wire rack under the dish prevents sogginess.
Can I substitute Gruyère with another cheese?
Yes! For a sharper flavor, use extra-sharp cheddar or Parmesan. For a milder taste, try Monterey Jack or Colby Jack. If omitting Gruyère entirely, add ½ teaspoon mustard powder to compensate for its nutty depth. Always grate fresh—pre-shredded cheeses won’t melt as smoothly.
How do I fix a watery cheese sauce?
Watery sauce usually means the roux wasn’t cooked long enough. Remove the dish from the oven, stir in 1 tablespoon cornstarch mixed with 1 tablespoon cold water, then bake for an additional 5-10 minutes. For future batches, ensure your roux is a deep golden color and cook it for 3-5 minutes before adding milk.